
NOTE
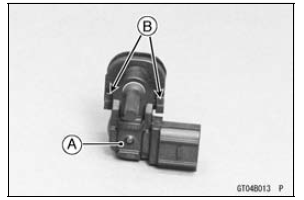
The intake air pressure sensor #2 is the same part as the intake air pressure sensor #1.
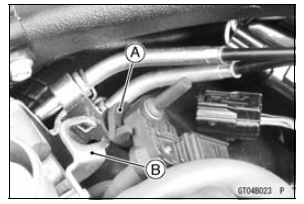
Position the intake air pressure sensor #2 [A] between the projections [B] on the rubber damper.


 Intake Air Pressure Sensor #2 Removal
 Intake Air Pressure Sensor #2 Input Voltage Inspection
Engine Vacuum Synchronization Inspection
NOTE
These procedures are explained on the assumption that
the intake and exhaust systems of the engine are in
good condition.
Situate the motorcycle so that it is vertical.
Remove:
Fuel Tank (see Fuel Tank Removal in the Fuel System
(DFI) chapter)
Air Cleaner Housing (see Air Cleaner ...
Chain Slack Inspection
Set the motorcycle up on its side
stand.
Rotate the rear wheel to find the position
where the chain is tightest, and
measure the maximum chain slack
by pulling up and pushing down the
chain midway between the engine
sprocket and rear wheel sprocket.
A. Chain Slack
If the ...
Exploded View
7. US, CA and CAL Models
8. Immobilizer System Equipped Models
9. ZX1000JD/KD
AD: Apply adhesive.
L: Apply a non-permanent locking agent.
R: Replacement Parts
13. Other than US, CA and CAL Models
CL: Apply cable lubricant.
EO: Apply engine oil.
G: Apply grease.
L: Apply a ...