
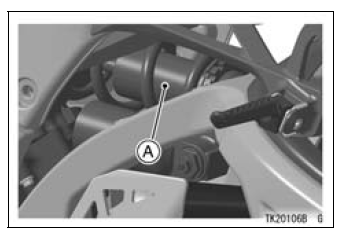
A. Rear Shock Absorber
Spring Preload Adjustment
The spring adjusting nut on the rear shock absorber can be adjusted.
If the spring action feels too soft or too stiff, have it adjusted by an authorized Kawasaki dealer.
 Rear Shock Absorber
 Rebound Damping Force Adjustment
Warning Indicator Light (LED)
Light (LED) Inspection
The warning indicator light (LED) [A] is used for the FI indicator,
immobilizer indicator (immobilizer equipped models),
water temperature warning indicator and oil pressure
warning indicator.
In this model, the warning indicator light (LED) (FI/immobilizer)
goes ...
Catalytic Converter
This motorcycle is equipped with a
catalytic converter in the exhaust system.
The converter reacts with carbonmonoxide,
hydrocarbons and nitrogen
oxides to convert them into carbon
dioxide, water, nitrogen and oxygen resulting
in much cleaner exhaust gases
to be discharged into the atmosphe ...
Moving Off
Check that the side stand is up.
Pull in the clutch lever.
Shift into 1st gear.
Open the throttle a little, and start to
let out the clutch lever very slowly.
As the clutch starts to engage, open
the throttle a littlemore, giving the engine
just enough fuel to keep it from
stallin ...