
There is an adjuster on the brake lever. The adjuster has 6 positions so that the released lever position can be adjusted to suit the operator’s hands.
Push the lever forward and turn the adjuster to align the number with the mark on the lever holder. The distance from the grip to the released lever is minimum at Number 6 and maximum at Number 1.
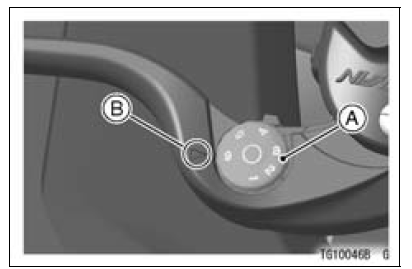
A. Adjuster
B. Mark
 Starter Button
 Fuel Tank Cap
Piston Ring Thickness Inspection
Measure the piston ring thickness.
Use the micrometer to measure at several points around
the ring.
Piston Ring Thickness
Standard:
Top [A] 0.77 0.79 mm (0.0303
0.0311 in.)
Second [B] 0.78 0.79 mm
(0.0307 0.0311 in.)
Service Limit:
Top 0.70 mm (0.0276 in.)
Second 0.71 mm (0.0280 ...
Battery Installation
Visually inspect the surface of the battery container.
If any signs of cracking or electrolyte leakage from the
sides of the battery.
Put the battery into the rear fender
Install the band [A].
Connect the positive (+) cable [B] (red cap) to the positive
(+) terminal first, and then ...
Front Caliper Removal
Remove:
Bolt [A]
Front Wheel Rotation Sensor [B]
Loosen the banjo bolt [C] at the brake hose lower end,
and tighten it loosely.
Unscrew the caliper mounting bolts [D], and detach the
caliper [E] from the disc.
NOTICE
Do not loosen the caliper assembly bolts [F]. Take
out only ...