
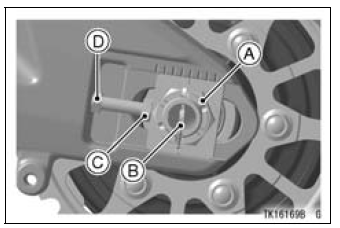
A. Axle Nut
B. Cotter Pin
C. Adjuster
D. Locknut
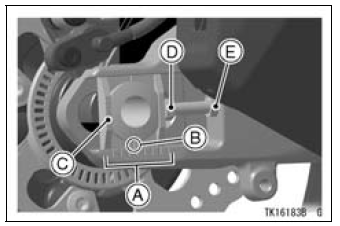
A. Marks
B. Notch
C. Indicator
D. Adjuster
E. Locknut
NOTE
Wheel alignment can also be checked using the straightedge or string method.
| WARNING Misalignment of the wheel will result in abnormalwear, andmay result in an unsafe riding condition. Align the rear wheel using the marks on the swingarm or measuring the distance between the center of the axle and swingarm pivot. |
Tightening Torque
NOTE
If a torque wrench is not available, this item should be serviced by an authorized Kawasaki dealer.
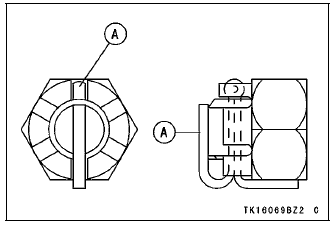
A. Cotter Pin
NOTE
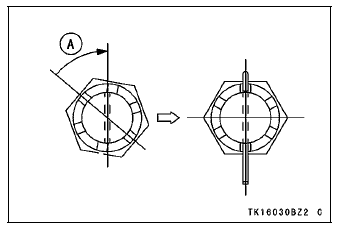
A. Turn Clockwise
| WARNING A loose axle nut can lead to an accident resulting in serious injury or death. Tighten the axle nut to the proper torque and install a new cotter pin. |
 Chain Slack Inspection
 Wear Inspection
Exhaust Pipe Installation
Replace the exhaust pipe gaskets [A] and premuffler
chamber gasket [B] with new ones.
Install the premuffler chamber gasket to the premuffler
chamber [C] until it is bottomed so that the chamfer side
faces exhaust pipe [D].
Install the exhaust pipe clamp [E] as shown in the figure.
I ...
Swingarm Removal
Remove:
Rear Wheel (see Rear Wheel Removal in the
Wheels/Tires chapter)
Mud Guard with Rear Brake Hose (see Mud Guard Removal
in the Frame chapter)
Rocker Arm (see Rocker Arm Removal)
Remove:
Brake Hose Clamp Bolt [A]
Unscrew the swingarm pivot shaft nut [A].
Usi ...
Lower Fairing Installation
Installation is the reverse of removal. Note the following.
When installing the pad [A], align the edge of the pad and
the marking of the fairing [B].
When installing the pad [C], align the edge of the pad and
the fairing [D], and fit the edge of the pad to the boss [E].
Insert the hoo ...