
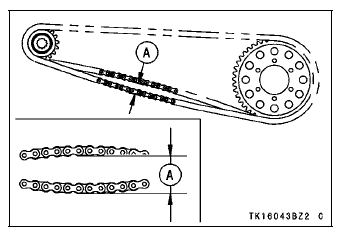
A. Chain Slack
Drive Chain Slack

 Drive Chain
 Chain Slack Adjustment
Front Fork Oil Change
Remove the front fork (see Front Fork Removal (Each
Fork Leg)).
Turn the spring preload adjuster fully counterclockwise for
removing the piston rod assy easily.
Hold the inner tube lower end in a vise.
Using the wrench [A], unscrew the top plug [B] out of the
outer tube.
Special Too ...
Check 3-7 Stop Watch Inspection
Connect the leads in the same circuit as Check 3-2.
By pushing the upper button each time to set the stop
watch mode.
Connect the insulated auxiliary lead processed insulation
to the terminal [13] as shown in the figure, then stop watch
start to count.
While count the stop watch, conn ...
Rebound Damping Force Adjustment
To adjust the rebound damping force, turn the rebound
damping adjuster [A].
The standard adjuster setting is the 3 3/4 turns out from
the fully clockwise position.
WARNINGIf both adjusters are not adjusted
equally, handling
may be impaired and a hazardous condition may
res ...