
Use clean, fresh unleaded gasoline with a minimum Antiknock Index of 90.
The Antiknock Index is posted on service
station pumps. The octane rating
of a gasoline is a measure of its resistance
to detonation or “knocking.” The
Antiknock Index is an average of the
Research Octane Number (RON) and
the Motor Octane Number (MON) as
shown in the table.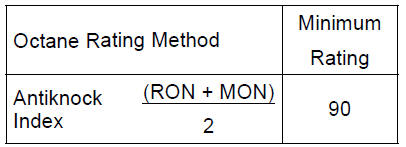
NOTICE
Use minimum of 90 octane gasoline only to prevent severe engine damage.
NOTICE
If engine “knocking” or “pinging” occurs, use a different brand of gasoline of a higher octane rating. If this condition is allowed to continue it can lead to severe engine damage.
Gasoline quality is important.
Fuels of low quality or not meeting standard industry specifications may result in unsatisfactory performance. Operating problems that result from the use of poor quality or nonrecommended fuel may not be covered under your warranty.
 Fuel Tank
 Fuels Containing Oxygenates
Tachometer
The tachometer shows the engine
speed in revolutions per minute (r/min,
rpm).
On the right side of the tachometer
face is a portion called the “red zone”.
Engine r/min (rpm) in the red zone is
above maximum recommended engine
speed and is also above the range for
good performance.
...
Cable Removal
Remove:
Air Cleaner Housing (see Air Cleaner Housing Removal
in the Fuel System (DFI) chapter)
Right Lower Fairing (see Lower Fairing Removal in the
Frame chapter)
Loosen the nuts [A], and slide the lower end of the clutch
cable to give the cable plenty of play.
Screw in the ...
Canister Inspection
Refer to the Evaporative Emission Control System Inspection
(CAL and SEA-B1 Models) in the Periodic Maintenance
chapter.
1. Green Hoses (Purge)
2. Fittings
3. Canister
4. White Hose (Vacuum)
5. Throttle Body Assy
6. Fuel Tank
7.Red Hose (Return)
8. Blue Hose (Breather)
9. Brack ...