
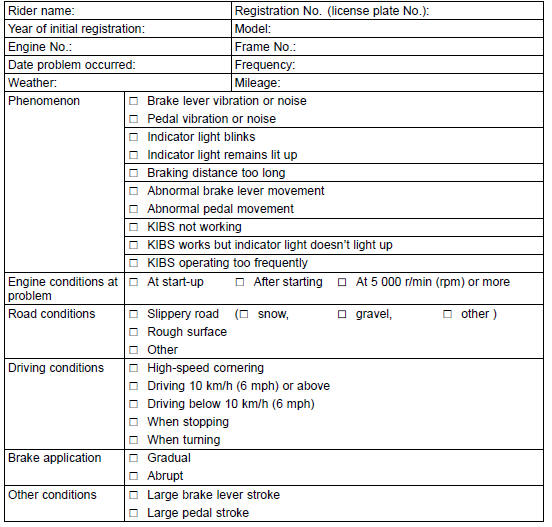
Sample Diagnosis Sheet
Pre-Diagnosis Inspection 1
Pre-Diagnosis Inspection 2
Self-diagnosis Outline
Refer to the Self-Diagnosis System chapter for the self-diagnosis or service code.
 KIBS Troubleshooting Outline
 ABS and KIBS Indicator Lights (LED) Inspection
What Are The Dealership’s Responsibilities?
Your Kawasaki dealer offers a wide range of services, parts, accessories, and
information on your product and on Kawasaki.
Each dealer is independently owned and operated and is responsible for the
dealership’s
operations, its repair, warranty, and service work, and its personnel.
Your dea ...
Stick Coil Inspection
Remove the stick coils (see Stick Coil Removal).
Measure the primary winding resistance [A] as follows.
Connect the hand tester between the coil terminals.
Set the tester to the × 1 Ω range, and read the tester.
Measure the secondary winding resistance [B] as follows.
Conn ...
Caliper Installation
Install the caliper and brake hose lower end.
For the front caliper, be sure to install the collars [A].
Replace the washers on each side of hose fitting with new
ones.
Touch the brake hoses [A] to the stopper [B] of the caliper.
Front Calipers [C]
Rear Caliper [D]
Tighten:
To ...