Kawasaki Ninja Owners Manual: Meter instruments

Kawasaki Ninja Owners Manual / General information / Meter instruments

Meter instruments


  1. Upper Button
  2. Lower Button
  3. Tachometer (with Shift-Up Indicator)
  4. Red Zone
  5. Ambient Brightness Sensor
  6. Turn Signal Indicator Light
  7. Warning Indicator Light (Red)
  8. Neutral Indicator Light
  9. Multifunction Meter
  10. High Beam Indicator Light
  11. Warning Indicator Light (Yellow)
  12. Fuel Level Warning Indicator Light

For models equipped with KIBS*

For models equipped with KIBS*


  1. Upper Button
  2. Lower Button
  3. Tachometer (with Shift-Up Indicator)
  4. Red Zone
  5. Ambient Brightness Sensor
  6. Turn Signal Indicator Light
  7. Warning Indicator Light (Red)
  8. Neutral Indicator Light
  9. Multifunction Meter
  10. High Beam Indicator Light
  11. Warning Indicator Light (Yellow)
  12. ABS Indicator Light

KIBS*: Kawasaki Intelligent anti-lock Brake System
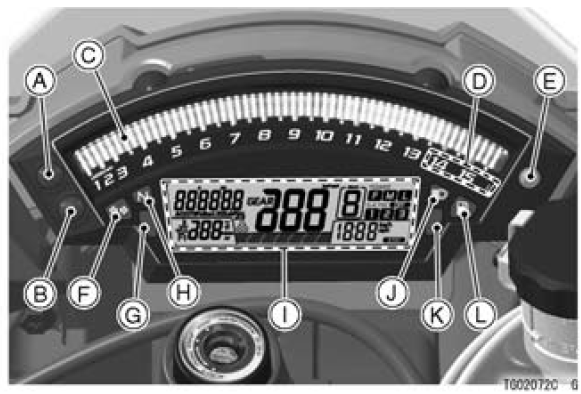
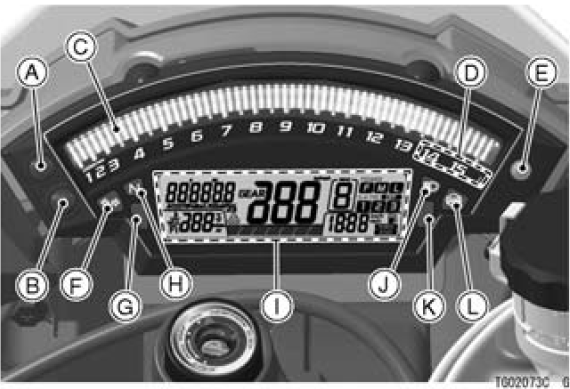
General information
...

Tachometer
The tachometer shows the engine speed in revolutions per minute (r/min, rpm). On the right side of the tachometer face is a portion called the “red zone”. Engine r/min (rpm) in the red zo ...

Other materials:

Coupling Bearing Installation
Replace the bearing with a new one. Press in the bearing [A] until it is bottomed. Special Tool - Bearing Driver Set [B]: 57001-1129 Pack the bearing with high-temperature grease. Replace the circlip with a new one. Special Tool - Inside Circlip Pliers: 57001-143 Replace the grease se ...

Sidestand Switch Operation Inspection
Raise the rear wheel off the ground with the stand (see Rear Wheel Removal in the Wheels/Tires chapter). Inspect the sidestand switch [A] operation accordance to below table. Sidestand Switch Operation If the sidestand switch operation does not work, inspect or replace the foll ...

Mud Guard Installation
Installation is the reverse of removal. Note the following. Run the hose and lead correctly (see Cable, Wire, and Hose Routing section in the Appendix chapter). Check the brake line. Apply a non-permanent locking agent to the threads of the mud guard mounting bolts [A, B], and tighten them ...