
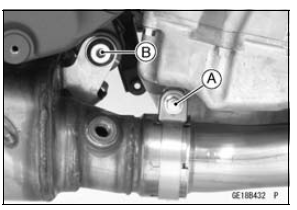
 Muffler Body Installation
 Premuffler Chamber Installation
Fuel Filter Cleaning
The fuel filter [A] is built into the fuel pump and can not be
cleaned or checked.
If the fuel filter is suspected of clogging or being damaged,
replace it with the fuel pump as a set.
Fuel Pump Circuit
1. Ignition Switch
2. Engine Stop Switch
3. Joint Connector E
4. ECU
5. Engine G ...
City Light (LED) Removal/Installation
Remove:
Upper Fairing Assembly (see Upper Faring Assembly
Removal in the Frame chapter)
Headlight (see Headlight Removal)
Remove the screws [A], and take the city light [B] off the
upper fairing assembly.
Installation is the reverse of removal. Note the following.
When inst ...
Check 2-1: Speedometer Inspection
Using the suitable stand, raise the rear wheel off the
ground.
Rotate the rear wheel by hand or start the engine.
Check that the display changes speedometer.
If the display function does not work, check the following
parts.
Rear Wheel Rotation Sensor (see Wheel Rotation Sensor
Inspe ...