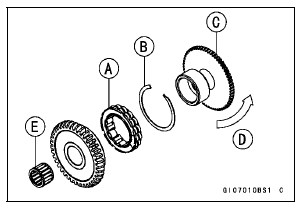

Face the circlip side of the one-way clutch to inside.

 Starter Clutch Disassembly
 Starter Clutch Inspection
Special Tools and Sealants
Outside Circlip Pliers:
57001-144
Piston Pin Puller Assembly:
57001-910
Piston Ring Compressor Grip:
57001-1095
Piston Ring Compressor Belt, 67
79:
57001-1097
Bearing Driver Set:
57001-1129
Liquid Gasket, TB1216B:
92104-1064
Liquid Gasket, TB1207B:
92104-2068
...
Brake Disc Warp Inspection
Raise the wheel off the ground with the jack.
Special Tools - Jack: 57001-1238
Jack Attachment: 57001-1608
For front disc inspection, turn the handlebar fully to one
side.
Set up a dial gauge against the disc [A] as shown in
the figure and measure disc runout, while turning [B] the
...
How Do I Get Warranty Service?
If there is a problem with your vehicle within the limited warranty period,
you will
need to schedule a service appointment and provide any maintenance records to
an authorized Kawasaki dealer for inspection and diagnosis. You can go to any
Kawasaki dealer for warranty repairs. Your Kawasaki de ...