
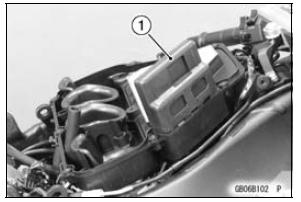
1. FI ECU
The FI ECU analyzes the motorcycle conditions based on the signals from the front/rear wheel rotation sensors and FI sensors (such as the crankshaft sensor and main throttle sensor), and controls engine power by reducing the number of ignition and retarding the ignition timing. The mode-switching signal is transmitted to the FI ECU by the CAN system via the meter ECU. If a failure occurs in the system, the FI ECU deactivates S-KTRC and displays the warning indication in the meter.
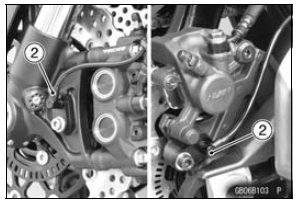
2. Wheel Rotation Sensor
The wheel rotation sensor converts front and rear wheel rotation speed to a pulse signal and transmits it to the FI ECU.
As for the KIBS (Kawasaki Intelligent anti-lock Brake System) equipped model, a pulse signal is transmitted via the KIBS ECU.
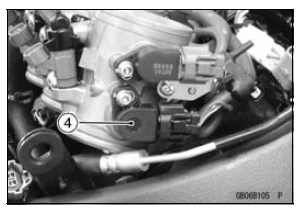
3. Crankshaft Sensor
The crankshaft sensor converts the engine speed to a pulse signal and transmits it to the FI ECU.
4. Main Throttle Sensor
The main throttle sensor converts the throttle position to a voltage signal and transmits it to the FI ECU.
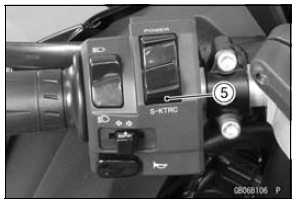
5. S-KTRC Button
The mode-switching signal is transmitted to the meter
ECU by depressing the S-KTRC button (0.3
 0.4 sec.).
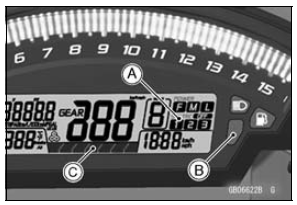
6. Multifunction Meter
The multifunction meter receives a mode-switching signal and displays the mode [A], and transmits it to the FI ECU by the CAN system.
When a failure occurs in the system, themultifunction meter displays the warning indication by blinking the warning indicator light (yellow LED) [B] and mode indicator symbol.
It also displays the S-KTRC operating conditions in the level indicator [C].
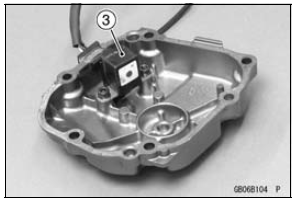
7. KIBS ECU
As for the KIBS equipped model, the front and rear wheel sensor signals are transmitted to the FI ECU via the KIBS ECU.

 Overview
 Mode-switching
CAN Communication Line
CAN Communication Line
Resistance Inspection
In this model, resistors for CAN communication line are
built in the ECU [A] and meter unit.
Refer to the Meter Unit Inspection in the Electrical System
chapter for the resistor in the meter unit.
Turn the ignition switch to OFF.
Remove:
EC ...
Fuses
Fuses are arranged in the fuse boxes
located under the passengerŌĆÖs seat and
in the left fairing. The main fuse is
located under the passengerŌĆÖs seat.
If a fuse fails during operation, inspect
the electrical system to determine
the cause, and then replace it with
a new fuse of proper amp ...
Current Mileage
This display mode shows the current
mileage by numerical value. The current
mileage display is renewed every
4 seconds.
A. Current Mileage
B. ŌĆ£km/LŌĆØ
NOTE
The display unit modes can be
changed, refer to the ŌĆ£Unit SettingŌĆØ
item in this section.
The numerical value shows ŌĆ£ ...