
Oxygen Sensor Removal/Installation
Refer to the Oxygen Sensor Removal/Installation (Equipped Models) in the Electrical System chapter.
Oxygen Sensor Inspection
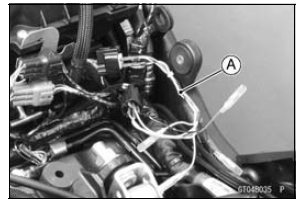
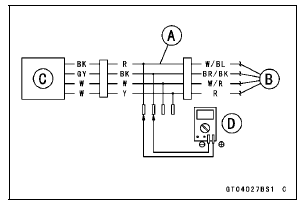
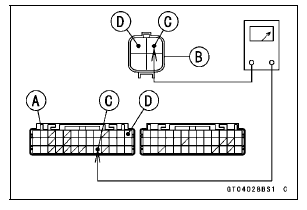
Main Harness [B] Oxygen Sensor [C]
Special Tool - Measuring Adapter: 57001-1700
Oxygen Sensor Output Voltage Connections to Adapter: Digital Meter (+) → R (sensor BK) lead Digital Meter (–) → BK (sensor GY) lead
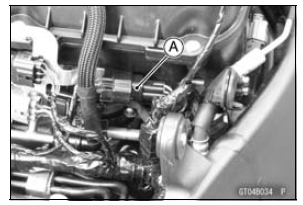
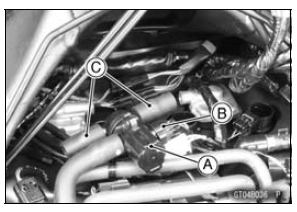
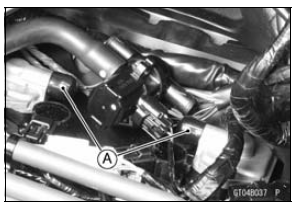
Do not disconnect the air switching valve connector [B].
Air Cleaner Housing (see Air Cleaner Housing Installation in the Fuel System (DFI) chapter) Fuel Tank (see Fuel Tank Installation in the Fuel System (DFI) chapter)
Measuring Adapter [A]
Output Voltage (with Plugs, Rich) Standard: DC 0.8 V or more
| WARNING The engine gets extremely hot during normal operation and can cause serious burns. Never touch a hot engine. |
Air Cleaner Housing (see Air Cleaner Housing Installation in the Fuel System (DFI) chapter) Fuel Tank (see Fuel Tank Installation in the Fuel System (DFI) chapter)
Output Voltage (without Plugs, Lean) Standard: DC 0.24 V or less
If the reading is out of the standard (with plugs: 0.8 V or more, without plugs: 0.24 V or less), remove the ECU and check the wiring for continuity between harness connectors.
Special Tool - Hand Tester: 57001-1394
Disconnect the ECU and sensor connectors.
Wiring Continuity Inspection ECU Connector [A] ←→ Oxygen Sensor Connector [B] W/BL lead (ECU terminal 35) [C] BR/BK lead (ECU terminal 13) [D]
If the wiring is good, replace the sensor.
If the reading is within the standard (with plugs: 0.8 V or more, without plugs: 0.24 V or less), check the ECU for its ground and power supply (see ECU Power Supply Inspection in the Fuel System (DFI) chapter).
If the ground and power supply are good, replace the ECU (see ECU Removal/Installation in the Fuel System (DFI) chapter).
Oxygen Sensor Circuit
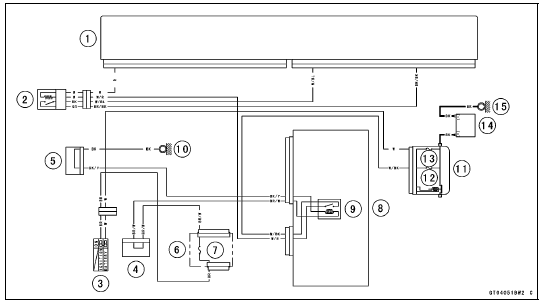
1. ECU
2. Oxygen Sensor
3. Ignition Switch
4. Joint Connector F
5. Joint Connector A
6. Fuse Box 1
7. Ignition Fuse 15 A
8. Relay Box
9. ECU Main Relay
10. Frame Ground 3
11. Starter Relay
12. ECU Fuse 15 A
13. Main Fuse 30 A
14. Battery
15. Engine Ground
 Subthrottle Sensor Resistance Inspection
 Exhaust Butterfly Valve Actuator Sensor (Service Code 34)
Air Intake Duct Removal
Remove:
Upper Fairing Assembly (see Upper Fairing Assembly
Removal in the Frame chapter)
Meter Bracket (see Meter Unit Removal/Installation in
the Electrical System chapter)
Immobilizer Amplifier [A] (Equipped Models) (see Immobilizer
System Parts Replacement in the Electrical System
...
ABS and KIBS Indicator Lights (LED) Inspection
In this model, the ABS indicator light (LED) [A] and KIBS
indicator light (LED) [B] go on or blink by the data sent
from the KIBS hydraulic unit.
Refer to the Meter Unit Inspection in the Electrical System
chapter.
ABS and KIBS Indicator Lights (LED) Function
*: The mode of “Low ...
Periodic Maintenance Chart
The scheduled maintenance must be done in accordance with this chart to keep
the motorcycle in
good running condition. The initial maintenance is vitally important and must
not be neglected.
Periodic Inspection
#: Service more frequently when operating in severe conditions; dusty, ...