
Lubricate the points shown below, with either motor oil or regular grease, in accordance with the Periodic Maintenance Chart or whenever the vehicle has been operated under wet or rainy conditions.
Before lubricating each part, clean off any rusty spots with rust remover and wipe off any grease, oil, dirt, or grime.
NOTE
A few drops of oil are effective to keep bolts and nuts from rusting and sticking. This makes removal easier.
Badly rusted nuts, bolts, etc., should be replaced with new ones.
Apply motor oil to the following pivots
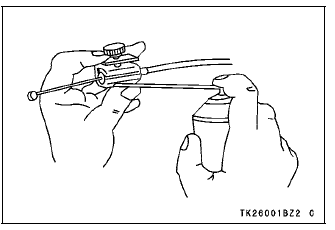
Lubricate the following cables with a pressure cable luber
Apply grease to the following points
(K): Should be serviced by an authorized Kawasaki dealer.
NOTE
After connecting the cables, adjust them.
 Fuses
FusesConnecting Rod Big End
Bearing Insert/Crankpin Wear Inspection
Remove the connecting rod big end (see Connecting Rod
Removal).
Cut strips of plastigage to crankpin width. Place a strip
on the crankpin parallel to the crankshaft installed in the
correct position.
Tighten the connecting rod big end nuts to the specified
torque (see Connecting Rod I ...
Commutator Cleaning and Inspection
Clean the metallic debris off the between commutator
segments [A].
NOTE
Do not use emery or sand paper on the commutator.
Check the commutator for damage or abnormal wear.
Replace the starter motor with a new one if there is any
damage or wear.
Visually inspect the commutato ...
Water Pump Inspection
Remove the left lower fairing (see Lower Fairing Removal
in the Frame chapter).
Check the drainage outlet passage [A] at the bottom of
the water pump body for coolant leaks.
If the mechanical seal is damaged, the coolant leaks
through the seal and drains through the passage. Replace
th ...
