

 Fuel Pump Operating Voltage Inspection
 Fuel Filter Cleaning
Keys
This motorcycle has a combination
key, which is used for the ignition
switch, steering lock, seat lock, and
fuel tank cap.
Included with the key is a key number,
which may be stamped on a separate
plate. Record the key number in
the space provided and store the number
in a safe place. If y ...
Exploded View
25. “1T” marked side faces up.
26. “T2” marked side faces up.
27. Hollow mark faces exhaust side.
G: Apply grease.
L: Apply a non-permanent locking agent.
LG: Apply liquid gasket.
M: Apply molybdenum disulfide grease.
MO: Apply molybdenum disulfide oil solution.
...
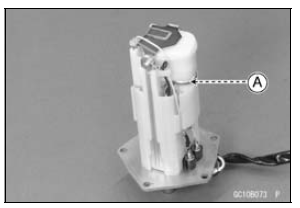
Fuel Filter Cleaning
The fuel filter [A] is built into the fuel pump and can not be
cleaned or checked.
If the fuel filter is suspected of clogging or being damaged,
replace it with the fuel pump as a set.
Fuel Pump Circuit
1. Ignition Switch
2. Engine Stop Switch
3. Joint Connector E
4. ECU
5. Engine G ...