
Thickness Gauge [A]
Air Gap
Standard: 0.4  1.6 mm (0.02
 0.06 in.)
If the measurement is not the standard, check each part for deformation and looseness and correct accordingly.
If the measurement is the standard, go to next step.
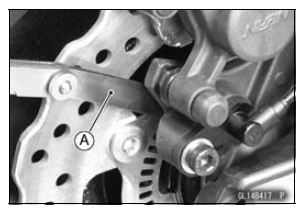
If the sensor and sensor rotor in bad condition, remove the any deposits. Install the proper part or replace faulty part.
If the all items are good, go to next step.
If this service code appears even if all checks are ended, replace the KIBS hydraulic unit
If the service code does not appear, the KIBS system normal (temporary failure).
 Front Wheel Rotation Sensor Wiring Inspection (Service Code b 43)
 Rear Wheel Rotation Sensor Wiring Inspection (Service Code b 45)
Average Mileage
This display mode shows the average
mileage by numerical value
counted from the start of measuring to
present time.
A. Average Mileage
B. “AV km/L�
While the average mileage is displayed,
push the lower button and
hold it in until the average mileage
values resets to “– †...
How Do I Get Warranty Service?
If there is a problem with your vehicle within the limited warranty period,
you will
need to schedule a service appointment and provide any maintenance records to
an authorized Kawasaki dealer for inspection and diagnosis. You can go to any
Kawasaki dealer for warranty repairs. Your Kawasaki de ...
Intake Air Pressure Sensor #1 Removal
NOTICE
Never drop the intake air pressure sensor #1 especially
on a hard surface. Such a shock to the sensor
can damage it.
Remove:
Air Cleaner Housing (see Air Cleaner Housing Removal
in the Fuel System (DFI) chapter)
Intake Air Pressure Sensor #1 Connector [A]
Remove the intake air ...