
NOTICE
Brake fluid quickly ruins painted plastic surfaces; any spilled fluid should be completely washed away immediately.

Take care not to spill the brake fluid on the painted or plastic parts.
Temporarily secure the end of the brake hose to some high place to keep fluid loss to a minimum.
Immediately wash away any brake fluid that spills.
Replace them with new ones.
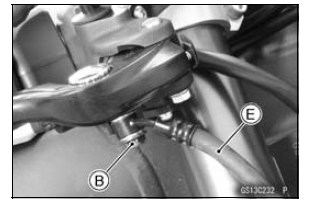
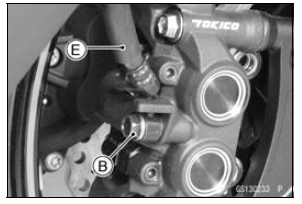
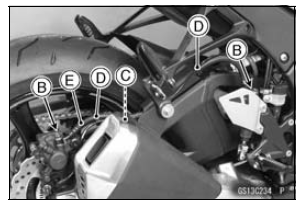
Torque - Brake Hose Banjo Bolts: 25 N┬Ěm (2.5 kgf┬Ěm, 18 ft┬Ělb)
NOTE
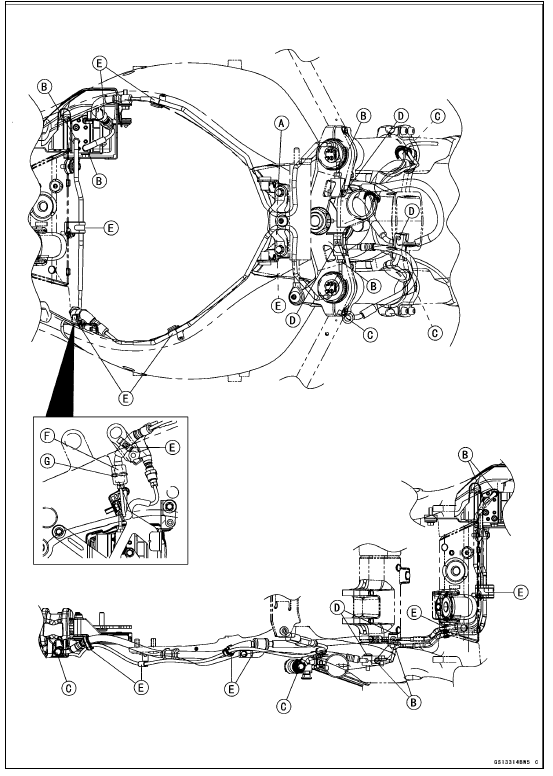
When removing the brake pipes and hoses on the hydraulic unit, remove them according to each assembly of the exploded view in the Brakes chapter.
If there is any damage, replace the damaged parts with new ones.
NOTE
Tighten the brake pipe joint nuts at both ends of the brake pipe temporarily and then tighten them to the specified torque.
Torque - Brake Hose Banjo Bolts: 25 N┬Ěm (2.5 kgf┬Ěm, 18 ft┬Ělb) Brake Pipe Joint Nuts: 18 N┬Ěm (1.8 kgf┬Ěm, 13 ft┬Ělb)
 Oil Filter Replacement
 Brake Fluid Change
Intake Air Temperature Meter
Intake air temperature meter indicates
temperature of the air in the air
cleaner case.
The ÔÇťIntake AirÔÇŁ is displayed if the intake
air temperature meter is selected.
A. Intake Air Temperature Meter
B. ÔÇťIntake AirÔÇŁ
NOTE
The intake air temperature meter
shift to the coolant temp ...
Front Wheel Rotation Sensor Wiring Inspection (Service Code b 43)
Disconnect the front wheel rotation sensor lead connector
[A] (see Front Wheel Rotation Sensor Removal in the
Brakes chapter).
Disconnect the KIBS hydraulic unit lead connector (see
KIBS Hydraulic Unit Removal in the Brakes chapter).
Check the wiring continuity of the W lead and ...
Break-in
The first 1 600 km (1 000 mi) that the motorcycle is ridden is designated
as the
break-in period. If the motorcycle is not used carefully during this period, you
may
very well end up with a ÔÇťbroken downÔÇŁ instead of a ÔÇťbroken inÔÇŁ motorcycle after
a
few thousand kilometers.
The fol ...