
NOTICE
This is a non-return type camshaft chain tensioner.
The push rod does not return to its original position once it moves out to take up camshaft chain slack.
Observe all the rules listed below.
When removing the tensioner, do not take out the mounting bolts only halfway. Retightening the mounting bolts from this position could damage the tensioner and the camshaft chain. Once the bolts are loosened, the tensioner must be removed and reset as described in “Camshaft Chain Tensioner Installation”.
Do not turn over the crankshaft while the tensioner is removed. This could upset the camshaft chain timing, and damage the valves.
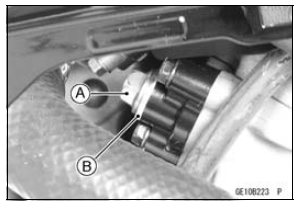
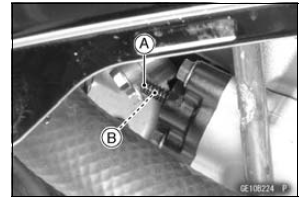
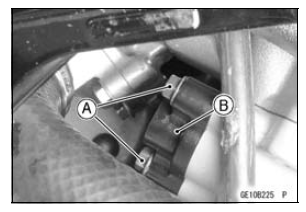
 Camshaft Chain Tensioner Installation
Information for Coolant
To protect the cooling system (consisting
of the aluminum engine and
radiator) from rust and corrosion, the
use of corrosion and rust inhibitor
chemicals in the coolant is essential. If
coolant containing corrosion and rust
inhibitor chemicals are not used, over
a period of time, the cooling ...
Clutch
Clutch Operation Inspection
Pull the clutch lever just enough to take up the free play
[A].
Measure the gap between the lever and the lever holder.
If the gap is too wide, the clutch may not release fully. If
the gap is too narrow, the clutch may not engage fully. In
either case, adjust ...
Master Cylinder Rubber Parts Replacement
Front Master Cylinder Disassembly
Remove the front master cylinder (see Front Master Cylinder
Removal in the Brakes chapter).
Remove the seal cover [A], circlip [B], connector [C] and
O-ring [D].
Special Tool - Inside Circlip Pliers: 57001-143
Unscrew the locknut [E] and pivot bolt ...
