
The coolant level should be between the “F� (Full) and “L� (Low) level lines.
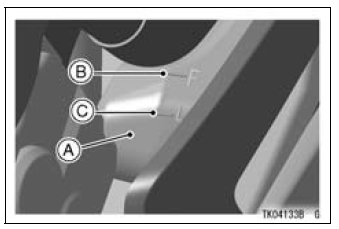
A. Reserve Tank
B. “F� (Full) Level Line
C. “L� (Low) Level Line
NOTE
 Information for Coolant
 Coolant Filling
Valve Guide Installation
Apply engine oil to the valve guide outer surface before
installation.
Heat the area around the valve guide hole to about 120
150°C (248 302°F).
NOTICE
Do not heat the cylinder head with a torch. This will
warp the cylinder head. Soak the cylinder head and
heat the oil.
Usin ...
Idle Speed Control Valve Actuator Installation
Replace the O-ring [A] with a new one.
Apply engine oil to the new O-ring.
Install the idle speed control valve [A] as shown in the
figure.
10° [B]
Tighten:
Torque - Idle Speed Control Valve Actuator Retainer
Screws: 2.06 N·m (0.21 kgf·m, 18 in·lb)
Install th ...
Vehicle-down Sensor Output Voltage Inspection
Remove the vehicle-down sensor.
Connect the measuring adapter [A] to the vehicle-down
sensor connectors as shown in the figure.
Special Tool - Measuring Adapter: 57001-1700
Main Harness [B]
Vehicle-down Sensor [C]
Connect a digital meter [D] to the measuring adapter
leads.
V ...