
NOTE
Be sure the battery is fully charged.
Special Tool - Throttle Sensor Setting Adapter #1: 57001 -1400
Exhaust Butterfly Valve Actuator Sensor Input Voltage Connections to Adapter: Digital Meter (+) → Y/W (actuator W) lead Digital Meter (−) → BK/BL (actuator BK) lead
Input Voltage
Standard: DC 4.75  5.25 V
If the reading is within the standard, check the output voltage (see Exhaust Butterfly Valve Actuator Sensor Output Voltage Inspection).
If the reading is out of the standard, remove the ECU and check the wiring for continuity between main harness connectors.
Disconnect the ECU and sensor connectors.
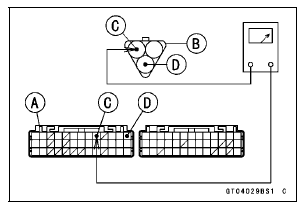
Wiring Inspection ECU Connector [A] ←→ Exhaust Butterfly Valve Actuator Sensor Connector [B] BL lead (ECU terminal 9) [C] BR/BK lead (ECU terminal 13) [D]
If the wiring is good, check the ECU for its ground and power supply (see ECU Power Supply Inspection in the Fuel System (DFI) chapter).
If the ground and power supply are good, replace the ECU (see ECU Removal/Installation in the Fuel System (DFI) chapter).
 Exhaust Butterfly Valve Actuator Sensor (Service Code 34)
 Exhaust Butterfly Valve Actuator Sensor Output Voltage Inspection
Camshaft Runout Inspection
Remove the camshafts (see Camshaft Removal).
Set the camshaft in a camshaft alignment jig or on V
blocks.
Measure the runout with a dial gauge at the specified
place as shown in the figure.
If the runout exceeds the service limit, replace the
camshaft.
Camshaft Runout
Standard: TIR ...
Clutch Removal
Remove:
Clutch Cover (see Clutch Cover Removal)
Clutch Spring Bolts [A]
Clutch Springs (with Clutch Spring Holders)
Clutch Spring Plate [B]
Pusher [C]
Remove:
Friction Plates (10) [A]
Steel Plates (9) [B]
Spring [C]
Spring Seat [D]
Hold the sub clutch hub [A] ...
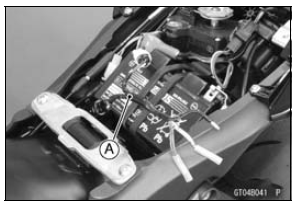
Fuses
Fuses are arranged in the fuse boxes
located under the passengerŌĆÖs seat and
in the left fairing. The main fuse is
located under the passengerŌĆÖs seat.
If a fuse fails during operation, inspect
the electrical system to determine
the cause, and then replace it with
a new fuse of proper amp ...