
M: Apply molybdenum disulfide grease.
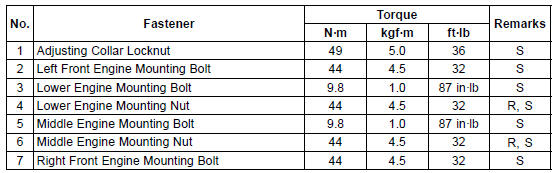
R: Replacement Parts
S: Follow the specified tightening sequence.
Special Tool
Engine Mount Nut Wrench:
57001-1450 
Hub Bearing Inspection
Since the hub bearings are made to extremely close tolerances,
the clearance can not normally be measured.
NOTE
Do not remove any bearings for inspection. If any bearings
are removed, they will need to be replaced with
new ones.
Turn each bearing in the hub back and forth [A] while
checki ...
Master Cylinder Inspection (Visual Inspection)
Remove the master cylinders (see Front/Rear Master
Cylinder Removal).
Disassemble the front and rear master cylinders (see
Master Cylinder Rubber Parts Replacement in the Periodic
Maintenance chapter).
Check that there are no scratches, rust or pitting on the
inner wall [A] of each ma ...
Storage
Preparation for Storage
Clean the entire vehicle thoroughly
Run the engine for about five minutes to warm the oil, shut it off, and
drain the
engine oil.
WARNINGEngine oil is a toxic substance. Dispose
of used oil properly. Contact
your local authorities for approved disp ...

