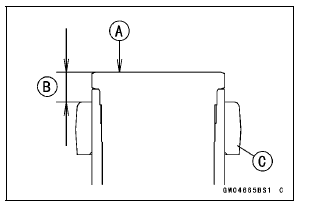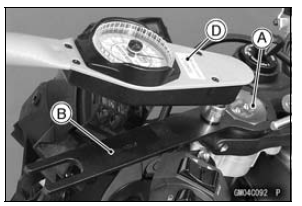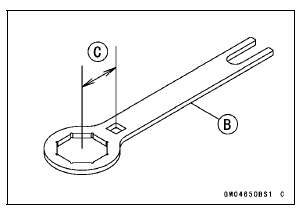

11 mm (0.43 in.) [B] Steering Stem Head [C]

NOTE
Tighten the two lower front fork clamp bolts alternately two times to ensure even tightening torque.
NOTE

Formula: a × b ÷ (b + c) = d
[a] Specified torque
[b] Length from center of square hole to grip point
[c] Offset = 44 mm
[d] Tightening torque

For an example: 35 N·m × 310 ÷ (310 + 44) = 31 N·m
Tighten: Torque - Front Fork Clamp Bolts (Upper): 20 N·m (2.0 kgf·m, 15 ft·lb) Handlebar Clamp Bolts: 25 N·m (2.5 kgf·m, 18 ft·lb)
 Front Fork Removal (Each Fork Leg)
 Front Fork Oil Change
Lighting System
This motorcycle adopt the daylight system and have a
headlight relay in the relay box. The headlight does not
go on when the ignition switch and the engine stop switch
are first turned on. The headlight comes on after the starter
button is released and stays on until the ignition switch is
turn ...
Transmission Shaft Assembly
Apply molybdenum disulfide oil solution to the sliding surfaces
of the gears and shafts.
Install the gears and the gear bushings [A] with their holes
[B] aligned.
Replace any circlips removed with new ones.
Install the circlips [A] so that the opening [B] of it is aligned
with ...
Torque and Locking Agent
The following tables list the tightening torque for the major fasteners
requiring use of a
non-permanent locking agent or silicone sealant etc.
Letters used in the “Remarks” column mean:
AL: Tighten the two clamp bolts alternately two times to ensure even tightening
torque.
G: Apply ...