
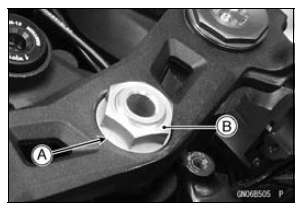
Apply a non-permanent locking agent to the threads of the handlebar positioning bolts and tighten them.
Torque - Handlebar Positioning Bolts: 9.8 N·m (1.0 kgf·m, 87 in·lb)
NOTE
Tighten the steering stem head bolt before tightening the upper front fork clamp bolts and handlebar clamp bolts.
| WARNING If the handlebar does not turn to the steering stop it may cause an accident resulting in injury or death. Be sure the cables, harnesses and hoses are routed properly and do not interfere with handlebar movement (see Cable, Wire, and Hose Routing section in the Appendix chapter). |
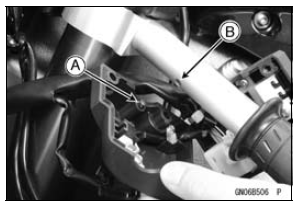
Fit the projection [A] into a hole [B] in the handlebar.
Torque - Switch Housing Screws: 3.5 N·m (0.36 kgf·m, 31 in·lb)
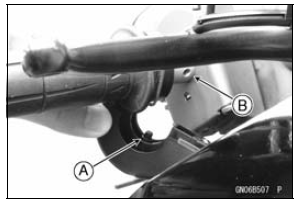
Fit the projection [A] into a hole [B] in the handlebar.
 Handlebar Removal
 Frame
FramePiston Removal
Remove:
Crankshaft (see Crankshaft Removal)
Remove the piston together with the connecting rod to the
cylinder head side.
NOTICE
Discard the connecting rod bolts and nuts. To prevent
damage to the crankpin surfaces, do not allow
the connecting rod bolts to bump against the
crankpins. ...
Subthrottle Sensor Output Voltage Inspection
Measure the output voltage at the subthrottle sensor in
the same way as input voltage inspection, note the following.
Disconnect the subthrottle sensor connector and connect
the setting adapter [A] between these connectors.
Special Tool - Throttle Sensor Setting Adapter: 57001
-1538
...
Brake Disc Installation
Install the brake disc on the wheel so that the marked side
[A] faces out.
Front Brake Discs [B]
Rear Brake Disc [C]
Apply a non-permanent locking agent to the threads of
the brake disc mounting bolts.
Tighten:
Torque - Brake Disc Mounting Bolts: 27 N·m (2.8 kgf·m, 20
...