
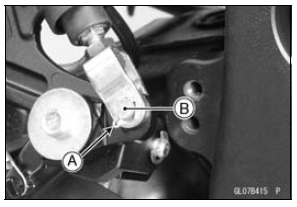
 Front Master Cylinder Installation
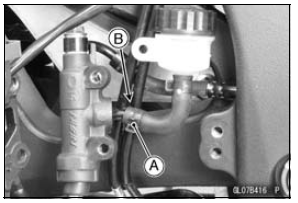
 Rear Master Cylinder Installation
Shift Drum Assembly
Press and insert the ball bearing [A] on the shift drum [B]
until it is bottomed.
Install:
Ball Bearing [C]
Dowel Pin [D] and Shift Drum Cam [E]
Align the pin with the groove in the shift drum cam.
Apply a non-permanent locking agent to the shift drum
cam holder bolt [F].
Tight ...
Front and Rear Brakes
Disc and disc pad wear is automatically
compensated for and has no effect
on the brake lever or pedal action.
So there are no parts that require adjustment
on the front and rear brakes.
WARNINGAir in the brake lines diminish
braking performance and can
cause an accident resulting ...
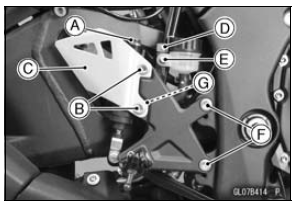
Steering Damper Installation
Install the following parts as shown in the figure.
Collar [A]
Washer (t = 3.5 mm, 0.14 in.) [B]
Steering Damper [C] (
ZX1000JC/KC)
Electronic Steering Damper [D] (ZX1000JD/KD)
Washer (t = 1.2 mm, 0.05 in.) [E]
Apply a non-permanent locking agent to the threads of
the steering ...