
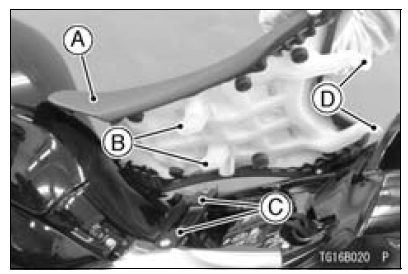
A. RiderŌĆÖs Seat
B. Tabs
C. Slots
D. Stays
 RiderŌĆÖs Seat Removal
 PassengerŌĆÖs Seat Installation
Precautions
1) No need of topping-up
No topping-up is necessary in this battery until it ends its life under
normal use. Forcibly prying
off the seal cap to add water is very dangerous. Never do that.
2) Refreshing charge.
Give refresh charge for 5 to 10 hours with charge current shown in the text
(see ...
Overview
S-KTRC is a highly sophisticated system based on MotoGP racing technology.
Unlike the KTRC
system used on the GTR1400 ABS (Concours 14 ABS in N. America), which is
designed to offer rider
reassurance when traversing slippery surfaces, S-KTRC, is designed to maximize
forward motion,
allowing ...
Crankshaft Sensor Installation
Apply a non-permanent locking agent to the crankshaft
sensor bolts [A].
Tighten:
Torque - Crankshaft Sensor Bolts: 5.9 N┬Ęm (0.60 kgf┬Ęm, 52
in┬Ęlb)
Using a high flash-point solvent, clean off any oil or dirt
that may be on the silicone sealant coating area. Dry
them with a clean cl ...