
NOTICE
Do not tap the screwdrivers. The rim could be damaged
 Balance Adjustment
 Balance Weight Installation
Throttle Body Assy Assembly
Before assembling, blow away dirt or dust from the throttle
body and delivery pipe assy by applying compressed air.
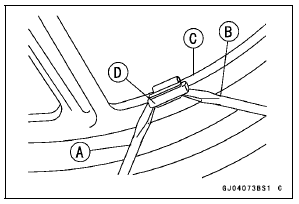
Replace the O-rings [A] of the joint pipe [B] with new ones.
Apply engine oil to the new O-rings, and insert it to the
delivery pipes [C].
Insert the joint pipe so th ...
Fuel Pump Relay Inspection
Refer to the Relay Circuit Inspection in the Electrical System
chapter.
If the fuel pump relay is normal, check the wiring to the
fuel pump relay (see Fuel Pump Relay Circuit).
Special Tool - Hand Tester: 57001-1394
If the wiring is good, check the ECU for its ground and
power supply (se ...
Cylinder (Upper Crankcase) Wear Inspection
Split the crankcase (see Crankcase Splitting).
Remove the pistons (see Piston Removal).
Assemble the cylinder (upper crankcase) [A], the cylinder
head [B] and the cylinder head gasket [C].
Tighten the cylinder head bolts (see Cylinder Head Installation
in the Engine Top End chapter).
...