
Due to friction plate wear and clutch cable stretch over a long period of use, the clutch operation should be checked each day before riding the motorcycle, and must be adjusted in accordance with the Periodic Maintenance Chart.
Inspection
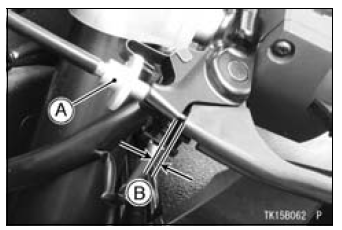
A. Adjuster
B. Clutch Lever Play
Clutch Lever Play

If the play is incorrect, adjust the lever play as follows.
Adjustment
| WARNING Excess clutch cable play could prevent clutch disengagement and cause a crash resulting in serious injury or death. When adjusting the clutch cable, be sure the upper end of the outer cable is fully seated in its fitting so that it doesn’t slip into place later and create excessive cable play. |
| WARNING The engine and exhaust system get extremely hot during normal operation and can cause serious burns. Never touch a hot engine or an exhaust pipe during clutch adjustment. |
NOTE
DANGER
Exhaust gas contains carbon monoxide, a colorless, odorless poisonous gas. Inhaling carbon monoxide can cause serious brain injury or death.
DO NOT run the engine in enclosed areas. Operate only in a well-ventilated area.
 Idle Speed
 Drive Chain
Front and Rear Brakes
Disc and disc pad wear is automatically
compensated for and has no effect
on the brake lever or pedal action.
So there are no parts that require adjustment
on the front and rear brakes.
WARNINGAir in the brake lines diminish
braking performance and can
cause an accident resulting ...
Regulator/Rectifier Inspection
Remove:
Upper Fairing Assembly (see Upper Fairing Assembly
Removal in the Frame chapter)
Right Inner Fairing (see Inner Fairing Removal in the
Frame chapter)
Bolts [A]
Regulator/Rectifier [B]
Set the hand tester to the × 1 kΩ range and make the
measurements show ...
Damping Force Adjustment (
ZX1000JC/KC)
To adjust the damping force, turn the damping adjuster
[A] until you feel a click.
The standard adjuster setting is the 18th click from the
1st of the fully clockwise position. If the damping feels too
soft or too stiff, adjust it in accordance with the following
table.
Damping Force Adj ...