
NOTE
The intake air pressure sensor #1 is the same part as the intake air pressure sensor #2.
Position the intake air pressure sensor #1 [A] between the projections [B] on the rubber damper.
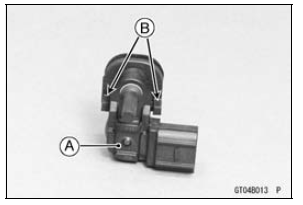
Install the rubber damper [A] on the bracket [B] as shown in the figure.
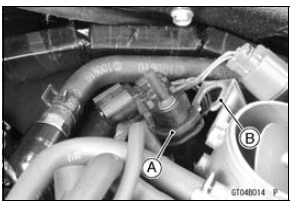
 Intake Air Pressure Sensor #1 Removal
 Intake Air Pressure Sensor #1 Input Voltage Inspection
Upper Crankcase Assembly
When installing the breather plate, replace the gasket [A]
with a new one.
Apply a non-permanent locking agent to the threads of
the bolts [A] and tighten them.
Torque - Breather Plate Bolts: 9.8 N·m (1.0 kgf·m, 87 in·lb)
Install the fitting [A] until it is bottomed ...
Connecting Rod Big End
Bearing Insert/Crankpin Wear Inspection
Remove the connecting rod big end (see Connecting Rod
Removal).
Cut strips of plastigage to crankpin width. Place a strip
on the crankpin parallel to the crankshaft installed in the
correct position.
Tighten the connecting rod big end nuts to the specified
torque (see Connecting Rod I ...
Piston Installation
Apply molybdenum disulfide oil solution to the oil ring expander,
and install the oil ring expander [A] in the bottom
piston ring groove so the ends [B] not butt together
Applymolybdenum disulfide oil solution to the oil ring steel
rails, and install the oil ring steel rails, one above th ...