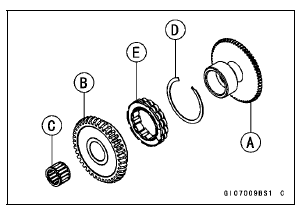


 Starter Clutch Installation
 Starter Clutch Assembly
Power mode
The Power mode determines the engine
power output characteristics and
has three settings.
The S-KTRC and the Power mode
can be set separately. By combining
each setting, the rider can get various
power feelings to suit riding conditions
or individual preference.
Mode F (Full Power):
The h ...
Service Code Erasing
When repair has been done, warning indicator light (LED) and warning symbol
go off and service
code are not displayed.
But the service codes stored in memory of the ECU are not erased to preserve
the problem history.
In this model, the problem history can not be erased. However, the memorie ...
Tie-Rod and Rocker Arm Bearing Installation
Replace the needle bearings [A] and oil seals with new
ones.
Apply plenty of grease to the lips of the oil seals.
Install the needle bearings and oil seals position as shown
in the figure.
Screw the needle bearing driver into the driver holder.
Insert the needle bearing driver into th ...