
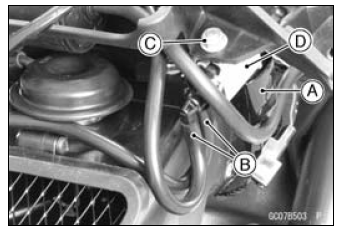
 Air Intake Duct Assembly (Other than US, CA and CAL Models)
 Air Intake Solenoid Valve
Installation (Other than US, CA
and CAL Models)
Air Intake Solenoid Valve
Installation (Other than US, CA
and CAL Models)Tie-Rod and Rocker Arm Bearing Installation
Replace the needle bearings [A] and oil seals with new
ones.
Apply plenty of grease to the lips of the oil seals.
Install the needle bearings and oil seals position as shown
in the figure.
Screw the needle bearing driver into the driver holder.
Insert the needle bearing driver into th ...
Gear Position Switch Inspection
NOTE
Be sure the transmission and external shift mechanism
are good condition.
Remove the fuel tank (see Fuel Tank Removal in the Fuel
System (DFI) chapter).
Disconnect the connector [A].
Set the hand tester [A] to the × 1 kΩ or × 100 Ω range
and connect i ...
DFI System Troubleshooting Guide
NOTE
This is not an exhaustive list, giving every possible cause for each
problem listed. It is meant
simply as a rough guide to assist the troubleshooting for some of the more
common difficulties in
DFI system.
The ECU may be involved in the DFI electrical and ignition system
tro ...