
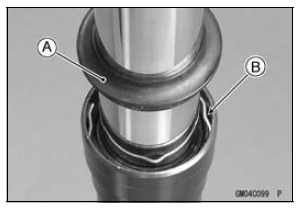
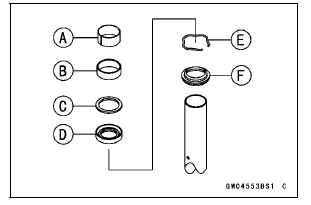
Slide Bushing [A] Guide Bushing [B] Washer [C] Oil Seal [D] Retaining Ring [E] Dust Seal [F]
 Front Fork Oil Change
 Front Fork Assembly
Crankcase Halves Assembly
Install:
Crankshaft (see Crankshaft Installation)
Connecting Rods (see Connecting Rod Installation)
Using a cleaning fluid, clean off any oil or dirt on the mating
surface of the crankcase halves.
Apply liquid gasket to the mating surface of the lower
crankcase half as shown in the fi ...
Fuses
Fuses are arranged in the fuse boxes
located under the passenger’s seat and
in the left fairing. The main fuse is
located under the passenger’s seat.
If a fuse fails during operation, inspect
the electrical system to determine
the cause, and then replace it with
a new fuse of proper amp ...
ABS Indicator Light (For models equipped with KIBS)
: Normally
the ABS indicator light goes on when the ignition switch is turned
“ON” and goes off shortly after the motorcycle starts moving. If the ABS is
normal,
it stays off. If the ABS indicator light shows any of the following, a fault or
faults may
have taken place in the ABS. You ...