
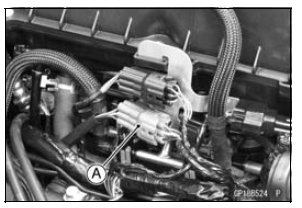
 Oxygen Sensor Installation (Equipped Models)
 Gear Position Switch Installation
Kawasaki Clean Air System
The Kawasaki Clean Air System
(KCA) is a secondary air suction system
that helps the exhaust gases to
burn more completely. When the spent
fuel charge is released into the exhaust
system, it is still hot enough to
burn. The KCA System allows extra
air into the exhaust system so that the
spen ...
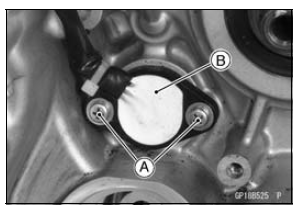
Compression Damping Force Adjustment
The compression damping force adjusters
for high and low speeds are located
on the gas reservoir at the left
side of the rear shock absorber.
A. High Speed Adjuster
B. Low Speed Adjuster
NOTE
Turning the high speed adjuster has
the low speed adjuster turning. Although
the low speed adju ...
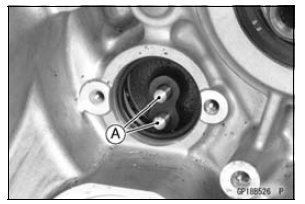
Stick Coil Primary Peak Voltage Inspection
NOTE
Be sure the battery is fully charged.
Remove the stick coils (see Stick Coil Removal).
Do not remove the spark plugs.
Connect the ECU to the harness.
Measure the primary peak voltage as follows.
Install the new spark plug [A] into each stick coil [B], and
ground them onto ...