
Fit the brake pad end into the recess [B] of the caliper holder.
Torque - Rear Brake Pad Pin: 17 N·m (1.7 kgf·m, 13 ft·lb) Rear Brake Pad Pin Plug: 2.5 N·m (0.25 kgf·m, 22 in·lb)
| WARNING After servicing, it takes several applications of the brake pedal before the brake pads contact the disc, which could result in increased stopping distance and cause an accident resulting in injury or death. Do not attempt to ride the motorcycle until a firm brake pedal is obtained by pumping the pedal until the pads are against the disc. |
Brake Pad Wear Inspection
Refer to the Brake Pad Wear Inspection in the Periodic Maintenance chapter.
 Rear Brake Pad Removal
 Master Cylinder
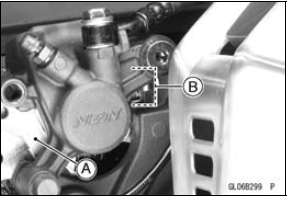
Oil Pressure Relief Valve Inspection
Remove the oil pressure relief valve (see Oil Pressure
Relief Valve Removal).
Check to see if the valve [A] slides smoothly when pushing
it in with a wooden or other soft rod, and see if it comes
back to its seat by spring [B] pressure.
NOTE
Inspect the valve in its assembled stat ...
External Shift Mechanism Removal
Remove:
Shift Lever (see Shift Pedal Removal)
Oil Pump Drive Gear (see Oil Pump Drive Gear Removal/
Installation in the Engine Lubrication System
chapter)
Circlip [A]
Washer [B]
Special Tool - Outside Circlip Pliers: 57001-144
Remove:
Shift Shaft Assembly [A]
Washer [B] ...
Exhaust Butterfly Valve Actuator Sensor Resistance Inspection
Turn the ignition switch to OFF.
Disconnect the exhaust butterfly valve actuator sensor
connector (3 pins connector) [A] (see Exhaust Butterfly
Valve Actuator Sensor Input Voltage Inspection).
Connect a digital meter [B] to the exhaust butterfly valve
actuator sensor connector.
Measur ...