
NOTICE
Do not lay the wheel on the ground with the disc facing down. This can damage or warp the disc.
Place blocks under the wheel so that the disc does not touch the ground.
 Engine Sprocket Installation
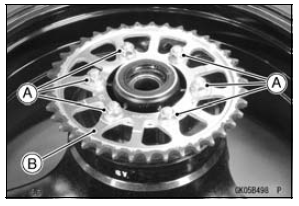
 Rear Sprocket Installation
Hoses and Pipes
Hose Installation
Install the hoses and pipes, being careful to follow bending
direction. Avoid sharp bending, kinking, flattening or
twisting.
Run the hoses (see Cable, Wire, and Hose Routing section
in the Appendix chapter).
Install the clamp [A] as near as possible to the hose end
...
Front Wheel Removal
Remove:
Front Caliper Mounting Bolts [A] (Both Sides)
Front Caliper [B] (Both Sides)
Loosen:
Front Axle Clamp Bolts [A] (Right Side)
Front Axle [B]
Remove the lower fairings (see Lower Fairing Removal in
the Frame chapter).
Raise the front wheel off the ground.
...
Kawasaki Intelligent anti-lock Brake System (KIBS,
For models equipped with KIBS)
KIBS regulates anti-lock braking performance
with more precision during
sports riding compared to a conventional
ABS system.
KIBS is designed to help prevent
the wheels from locking up when the
brakes are applied hard while riding
straight. KIBS automatically regulates
brake force using en ...