
NOTICE
Do not tap the starter motor shaft or body. Tapping the shaft or body could damage the motor.
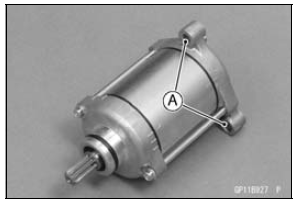

 Starter Motor Removal
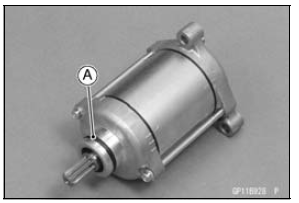
 Starter Motor Disassembly
Front Fork Installation (Each Fork Leg)
Install the fork so that the top plug end [A] as shown in the
figure.
11 mm (0.43 in.) [B]
Steering Stem Head [C]
Tighten:
Torque - Front Fork Clamp Bolts (Lower): 23 N·m (2.3
kgf·m, 17 ft·lb)
NOTE
Tighten the two lower front fork clamp bolts alternately
two times to ensur ...
Brake Hose and Pipe Damage and Installation Condition Inspection
Inspect the brake hoses, pipes and fittings for deterioration,
cracks and signs of leakage.
The high pressure inside the brake line can cause fluid to
leak [A] or the hose to burst if the line is not properly maintained.
Bend and twist the rubber hose while examining
it.
Replace the ...
Lubrication
It is important to lubricate rotating or sliding parts during
assembly to minimize wear during initial operation. Lubrication
points are called out throughout this manual, apply
the specific oil or grease as specified.
Direction of Engine Rotation
When rotating the crankshaft by hand, the fre ...