
NOTICE
Do not remove the bearings for inspection. Removal may damage them.
The rollers and ball in a bearing normally wear very little, and wear is difficult to measure. Instead of measuring, visually inspect the bearing for abrasion, discoloration, or other damage.
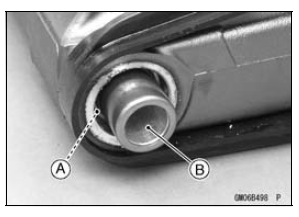
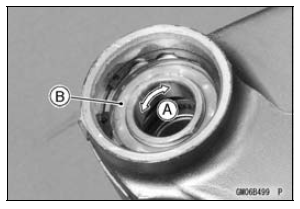
If the needle bearing, and sleeve [B] show any sings of abnormal wear, discoloration, or damage, replace them as a set.
If bearing play, roughness, or binding is found, replace the bearing.
If the seal is torn or is leaking, replace the bearing.
Swingarm Bearing Lubrication
NOTE
Since the bearing are packed with grease and sealed, lubrication is not required.
 Swingarm Bearing Installation
Wiring Diagram (US, CA and CAL without KIBS Models)
ZX1000JC
ZX1000JD
...
DFI System Wiring Diagram (KIBS Equipped Models)
1. Air Intake Solenoid Valve (Other than US, CA and CAL Models)
2. Engine Stop Switch
3. Starter Button
4. Air Switching Valve
5. Stick Coil #1, #2, #3, #4
6. Spark Plugs
7. Intake Air Temperature Sensor
8. Crankshaft Sensor
9. Secondary Fuel Injector #1
10. Secondary Fuel Injector #2
...
Clutch
Due to friction plate wear and clutch
cable stretch over a long period of use,
the clutch operation should be checked
each day before riding the motorcycle,
and must be adjusted in accordance
with the Periodic Maintenance Chart.
Inspection
Check that the clutch lever operates
properly an ...
