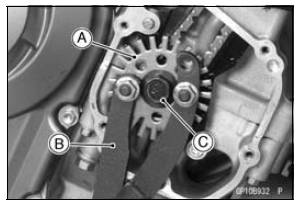

Holding the timing rotor with the flywheel & pulley holder [B] and unscrew the bolt [C].
Special Tool - Flywheel & Pulley Holder: 57001-1605

 Crankshaft Sensor Peak Voltage Inspection
 Timing Rotor Installation
Valve Clearance Adjustment
To change the valve clearance, remove the camshafts
(see Camshaft Removal in the Engine Top End chapter)
and valve lifters.
Replace the shim with one of a different thickness.
NOTE
Mark and record the locations of the valve lifters and
shims so that they can be reinstalled in their ...
ECU Identification
Most countries have their own regulations, so each ECU
has different characteristic. So, do not confuse ECU with
each other and use only the ECU for your model. Otherwise,
the motorcycle can not clear the regulation.
ECU Identification
ZX1000JB/KB
ZX1000JC /KC
...
Torque and Locking Agent
The following tables list the tightening torque for the major fasteners
requiring use of a
non-permanent locking agent or silicone sealant etc.
Letters used in the “Remarks” column mean:
AL: Tighten the two clamp bolts alternately two times to ensure even tightening
torque.
G: Apply ...