
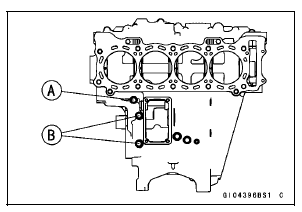
1. Loosen the M7 bolt [A].
2. Loosen the M8 bolts [B].
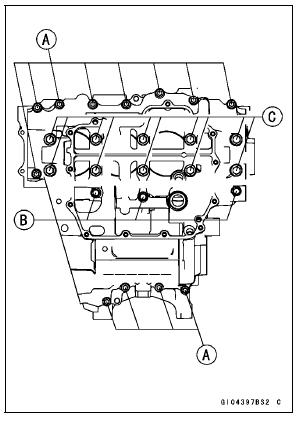
1. Loosen the M6 bolts [A].
2. Loosen the M7 bolts [B].
3. Loosen the M9 bolts [C].
Take care not to damage the crankcase.
 Crankcase
 Crankcase Assembly
Ignition Switch/Steering Lock
This is a three-position, key-operated
switch. The key can be removed from
the switch when it is in the OFF or
LOCK position.
A. Ignition Switch/Steering Lock
B. ON position
C. OFF position
D. LOCK position
NOTE
The tail, city and license plate lights
are on whenever the ignition key i ...
Axle Inspection
Remove the front and rear axles (see Front/Rear Wheel
Removal).
Visually inspect the front and rear axle for damages.
If the axle is damaged or bent, replace it.
Place the axle in V blocks that are 100 mm (3.94 in.) [A]
apart, and set a dial gauge [B] on the axle at a point
halfway ...
Front Fork Assembly
Replace the following parts with new ones.
Slide Bushing
Guide Bushing
Oil Seal
Install the following parts to the inner tube [A].
Dust Seal [B]
Retaining Ring [C]
Apply grease to the oil seal lips.
Install the oil seal [A] so that the stamp side faces lower
side.
Insta ...