

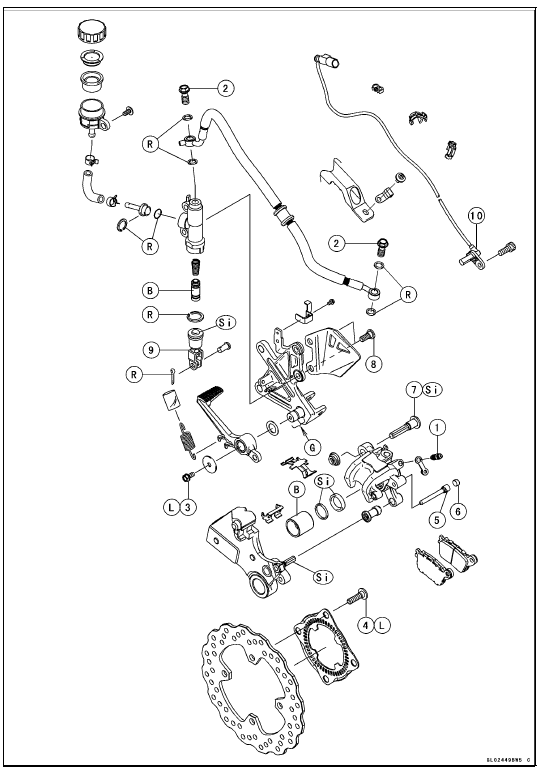
13. Front Wheel Rotation Sensor
B: Apply brake fluid.
L: Apply a non-permanent locking agent.
R: Replacement Parts
S: Follow the specified tightening sequence.
Si: Apply silicone grease (ex. PBC grease).
10. Rear Wheel Rotation Sensor
B: Apply brake fluid.
G: Apply grease.
L: Apply a non-permanent locking agent.
R: Replacement Parts
Si: Apply silicone grease (ex. PBC grease).
KIBS Equipped Models
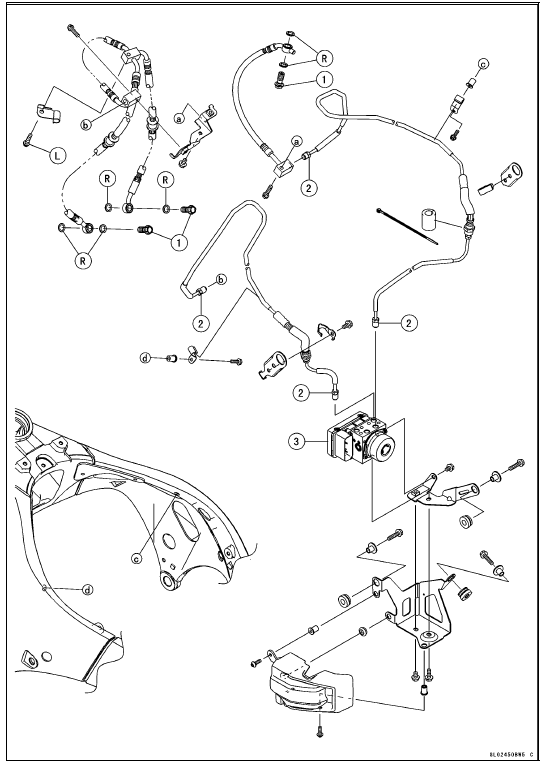

3. KIBS Hydraulic Unit
L: Apply a non-permanent locking agent
R: Replacement Parts
NOTE
When disassembling the brake hose and pipe, disassemble them by the unit as shown in the exploded view.
KIBS Equipped Models
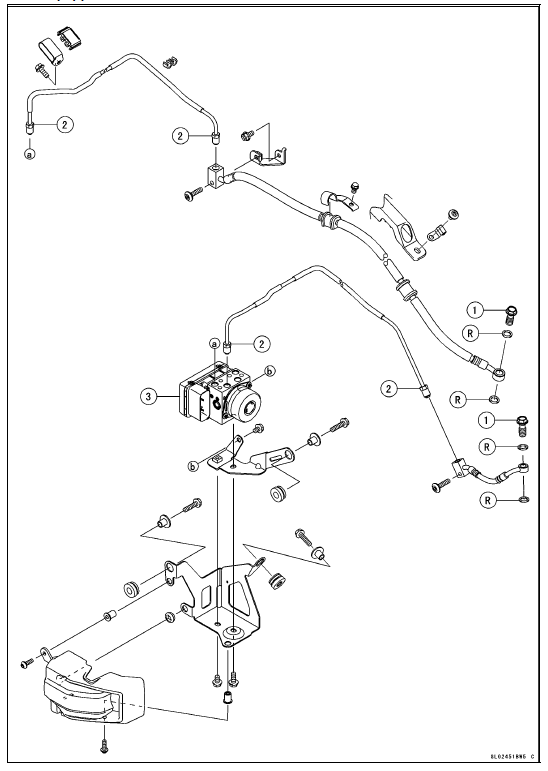

3. KIBS Hydraulic Unit
4. Rear Wheel Rotation Sensor
L: Apply a non-permanent locking agent.
R: Replacement Parts
NOTE
When disassembling the brake hose and pipe, disassemble them by the unit as shown in the exploded view.
Specifications
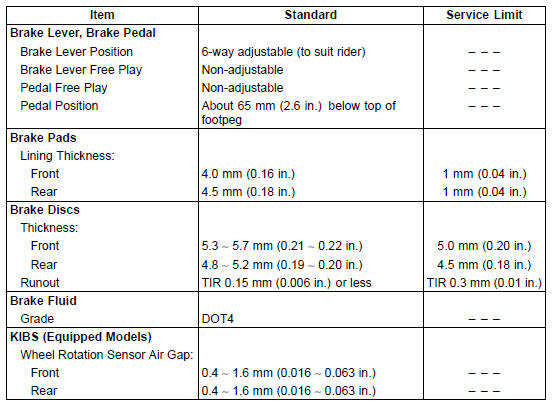
 Brakes
 Special Tools
Intake Air Pressure Sensor #2 Removal
NOTICE
Never drop the intake air pressure sensor #2 especially
on a hard surface. Such a shock to the sensor
can damage it.
Remove:
Air Cleaner Housing (see Air Cleaner Housing Removal
in the Fuel System (DFI) chapter)
Intake Air Pressure Sensor #2 Connector [A]
Remove the intake air ...
Fuse Inspection
Remove the fuse.
Inspect the fuse element.
If it is blown out, replace the fuse. Before replacing a
blown fuse, always check the amperage in the affected
circuit. If the amperage is equal to or greater than the
fuse rating, check the wiring and related components for
a short circuit.
...
Radiator and Radiator Fan Installation
If the radiator bracket [A] was removed, install it.
Install the radiator fan to the radiator
Tighten the radiator fan mounting bolts.
When installing the pad [B], install it so that the upper end
of the pad aligns with the corner top [C].
When install the pad [D], install it so that the ...