
The right and left front footpegs can be selected to one of two positions to suit the front preferences. Have the front footpeg positions changed by an authorized Kawasaki dealer.
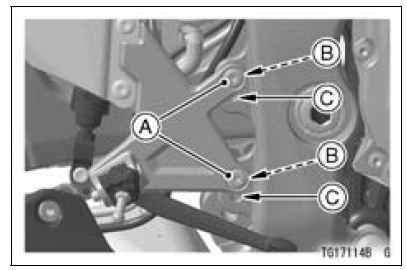
A. Bolts
B. Upper Position (Standard)
C. Lower Position
NOTE
Tightening Torque
Front Footpeg Bracket Bolts: 25 N·m (2.5 kgf·m, 18 ft·lb)
 Air Cleaner Intake
 Break-in
Warning/Indicator Lights
: When the
transmission is in
neutral, the neutral indicator light goes
on.
: When the
headlight is on high
beam, the high beam indicator light
goes on.
: When the
turn signal switch is
pushed to the left or right, the turn signal
indicator light blinks. ...
Engine Installation
Apply molybdenum disulfide grease to the threads of the
adjusting collars [A].
Install the adjusting collars to crankcase backside until
end of the threads.
Install the adjusting collar [A] to the frame until end of the
threads.
Replace the engine mounting nuts with ne ...
Drive Chain Slack Inspection
Refer to the Drive Chain Slack Inspection in the Periodic
Maintenance chapter.
Drive Chain Slack Adjustment
Refer to the Drive Chain Slack Adjustment in the Periodic
Maintenance chapter.
Wheel Alignment Inspection/Adjustment
Refer to the Wheel Alignment Inspection in the Periodic
Maintenance ...