
Use clean, fresh unleaded gasoline with a minimum Antiknock Index of 90.
The Antiknock Index is posted on service
station pumps. The octane rating
of a gasoline is a measure of its resistance
to detonation or “knocking.” The
Antiknock Index is an average of the
Research Octane Number (RON) and
the Motor Octane Number (MON) as
shown in the table.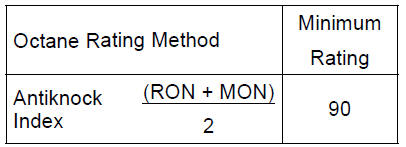
NOTICE
Use minimum of 90 octane gasoline only to prevent severe engine damage.
NOTICE
If engine “knocking” or “pinging” occurs, use a different brand of gasoline of a higher octane rating. If this condition is allowed to continue it can lead to severe engine damage.
Gasoline quality is important.
Fuels of low quality or not meeting standard industry specifications may result in unsatisfactory performance. Operating problems that result from the use of poor quality or nonrecommended fuel may not be covered under your warranty.
 Fuel Tank
 Fuels Containing Oxygenates
Crankcase Splitting
Remove the engine (see Engine Removal in the Engine
Removal/Installation chapter).
Set the engine on a clean surface and hold the engine
steady while parts are being removed.
Remove:
Cylinder Head (see Cylinder Head Removal in the Engine
Top End chapter)
Starter Motor (see Starter M ...
Clock
To adjust hours and minutes, do the
followings while the motorcycle is at a
stop.
Turn the ignition switch to “ON”.
Display the odometer in the multifunction
display. Refer to the “Multifunction
Display” item in this section.
Push the lower button for more than
2 seconds. Bot ...
Handlebar Installation
Apply a non-permanent locking agent to the threads of
the handlebar positioning bolts and tighten them.
Torque - Handlebar Positioning Bolts: 9.8 N·m (1.0 kgf·m,
87 in·lb)
Install the steering stem head with handlebars.
Install the washer [A] and steering stem head nut [B].
Tighten:
...