
NOTICE
When handling the quartz-halogen bulb, never touch the glass portion with bare hands. Always use a clean cloth. Oil contamination from hands or dirty rags can reduce bulb life or cause the bulb to explode.
NOTE
Clean off any contamination that inadvertently gets on the bulb with alcohol or soap and water solution.
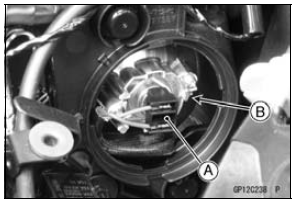
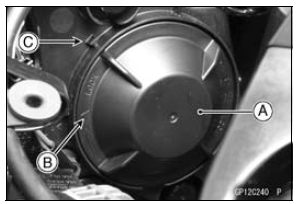
Turn the tab [B] upward.
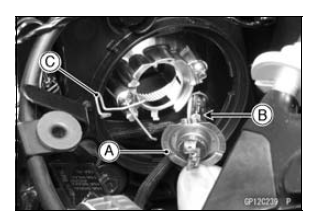
Another Bulb: Repeat the above steps.
 Lighting System
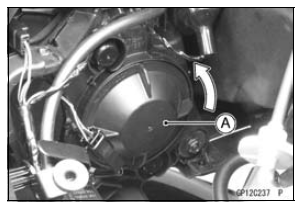
 Headlight Removal/Installation
Cylinder Head Cover Removal
Remove:
Air Suction Valves (see Air Suction Valve Removal)
Throttle Body Assy (see Throttle Body Assy Removal in
the Fuel System (DFI) chapter)
Stick Coils (see Stick Coil Removal in the Electrical System
chapter)
Remove the clamps [A].
Turn up the front side of the heat insulation ...
High Speed Compression Damping Adjustment
Turn the high speed compression
damping force adjuster clockwise to
increase damping force or counterclockwise
to decrease it.
NOTICE
Do not turn the compression
damping force adjuster beyond
the fully seated position or the
adjusting mechanism may be
damaged.
A. Compression Da ...
Tire Wear, Damage
As the tire tread wears down, the tire
becomes more susceptible to puncture
and failure. An accepted estimate is
that 90% of all tire failures occur during
the last 10% of tread life (90% worn).
So it is false economy and unsafe to
use the tires until they are bald
In accordance with the ...