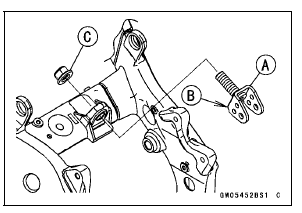


 Rear Shock Absorber Removal
 Rear Shock Absorber Inspection
Oil Filter Replacement
Drain the engine oil (see Engine Oil Change).
Remove the left lower fairing (see Lower Fairing Removal
in the Frame chapter).
Remove the oil filter [A] with the oil filter wrench [B].
Special Tool - Oil Filter Wrench: 57001-1249
Replace the filter with a new one.
Apply grease t ...
Gear Position Switch Inspection
NOTE
Be sure the transmission and external shift mechanism
are good condition.
Remove the fuel tank (see Fuel Tank Removal in the Fuel
System (DFI) chapter).
Disconnect the connector [A].
Set the hand tester [A] to the × 1 kΩ or × 100 Ω range
and connect i ...
Parts Location
NOTE
The front and rear wheel rotation sensors and rotors are
standard parts of this motorcycle.
Front Wheel Rotation Sensor [A]
Front Wheel Rotation Sensor Rotor [B]
Rear Wheel Rotation Sensor [C]
Rear Wheel Rotation Sensor Rotor [D]
ABS Indicator Light (LED) [E]
KIBS Indicator Ligh ...