
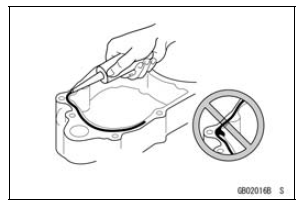
For applications that require Liquid Gasket or a Non-permanent Locking Agent, clean the surfaces so that no oil residue remains before applying liquid gasket or non-permanent locking agent. Do not apply them excessively.
Excessive application can clog oil passages and cause serious damage.
Press
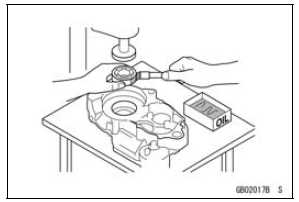
For items such as bearings or oil seals that must be pressed into place, apply small amount of oil to the contact area. Be sure to maintain proper alignment and use smooth movements when installing.
 Gasket, O-ring
 Ball Bearing and Needle Bearing
Camshaft Chain Tensioner Removal
NOTICE
This is a non-return type camshaft chain tensioner.
The push rod does not return to its original position
once it moves out to take up camshaft chain slack.
Observe all the rules listed below.
When removing the tensioner, do not take out the
mounting bolts only halfway. Retighteni ...
Charging Voltage Inspection
Check the battery condition (see Charging Condition Inspection).
Warm up the engine to obtain actual alternator operating
conditions.
Remove the front seat (see Front Seat Removal in the
Frame chapter).
Check that the ignition switch is turned off, and connect
the hand tester [A] to t ...
Hub Bearing Inspection
Since the hub bearings are made to extremely close tolerances,
the clearance can not normally be measured.
NOTE
Do not remove any bearings for inspection. If any bearings
are removed, they will need to be replaced with
new ones.
Turn each bearing in the hub back and forth [A] while
checki ...