
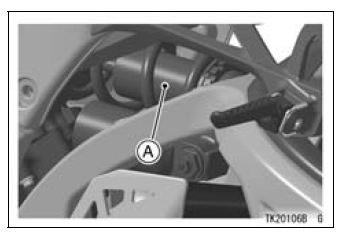
A. Rear Shock Absorber
Spring Preload Adjustment
The spring adjusting nut on the rear shock absorber can be adjusted.
If the spring action feels too soft or too stiff, have it adjusted by an authorized Kawasaki dealer.
 Rear Shock Absorber
 Rebound Damping Force Adjustment
Nozzle Assy Installation
Replace the dust seals [A] with new ones.
Apply engine oil to the new dust seals, and install them.
Install the nozzle assy securely.
Push the four mounting positions of the injectors.
Set the joint pipe parallel to the air cleaner housing [B].
NOTICE
When installing the nozzle assy, ap ...
Front Wheel Removal
Remove:
Front Caliper Mounting Bolts [A] (Both Sides)
Front Caliper [B] (Both Sides)
Loosen:
Front Axle Clamp Bolts [A] (Right Side)
Front Axle [B]
Remove the lower fairings (see Lower Fairing Removal in
the Frame chapter).
Raise the front wheel off the ground.
...
Main Throttle Sensor Resistance Inspection
Turn the ignition switch to OFF.
Measure the main throttle sensor resistance in the same
way as input voltage inspection, note the following.
Disconnect the throttle sensor setting adapter [A] from the
connector of the main harness side.
Special Tool - Throttle Sensor Setting Adapter: 57 ...