
ZX1000KC
ZX1000KD

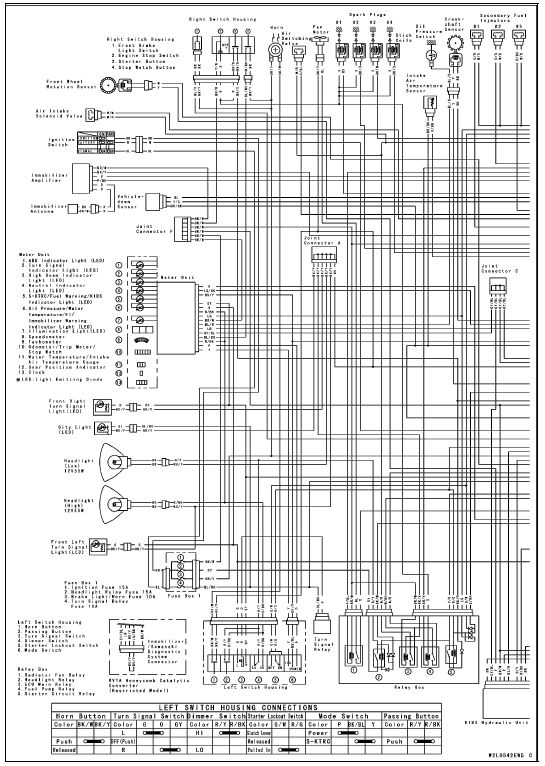
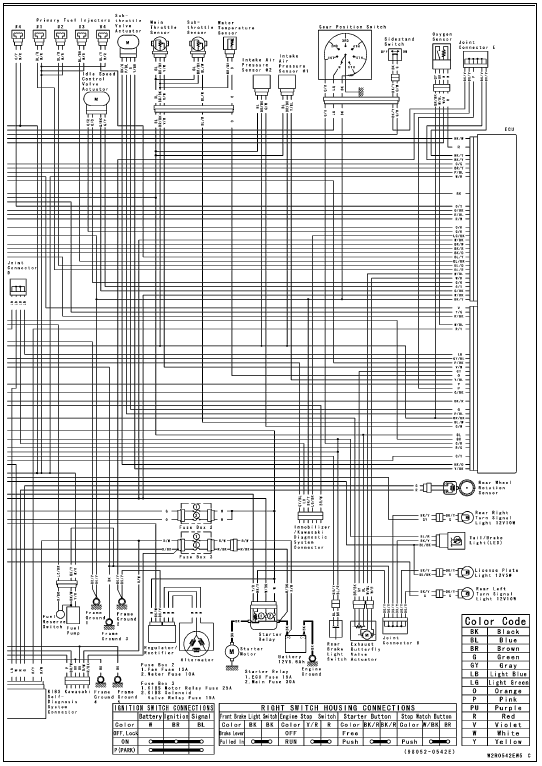
 Wiring Diagram (Other than US, CA and CAL without KIBS Models)
 Precautions
Fuel Tank Installation
Note the above WARNING (see Fuel Tank Removal).
Run the hoses correctly (see Cable, Wire, and Hose Routing
section in the Appendix chapter).
Check that the dampers [A] are in place on the fuel tank.
If the dampers are damaged or deteriorated, replace
them.
If the fuel tank brack ...
Gear Position Switch Inspection
NOTE
Be sure the transmission and external shift mechanism
are good condition.
Remove the fuel tank (see Fuel Tank Removal in the Fuel
System (DFI) chapter).
Disconnect the connector [A].
Set the hand tester [A] to the × 1 kΩ or × 100 Ω range
and connect i ...
Stick Coil Removal
Remove the air cleaner housing (see Air Cleaner Housing
Removal in the Fuel System (DFI) chapter).
Disconnect the stick coil connectors [A].
Pull out the stick coils [B] upward.
First, turn the stick coil by 90 degrees, and then pull it out
by twisting the coil head to the left and righ ...