
Sealant - Liquid Gasket, TB1216B: 92104-1064
NOTE
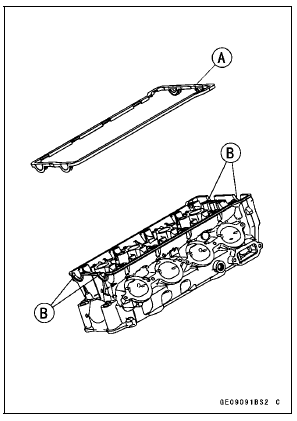
Make the application finish within 20 minutes when the liquid gasket (TB1216B) to the mating surface of the cylinder head cover is applied.
Dowel Pins [A] Plug Hole Gaskets [B]
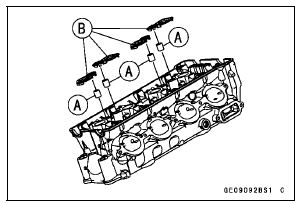
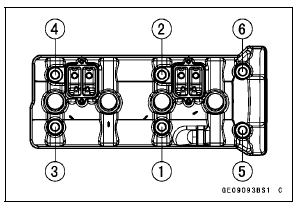
Torque - Cylinder Head Cover Bolts: 9.8 N·m (1.0 kgf·m, 87 in·lb)
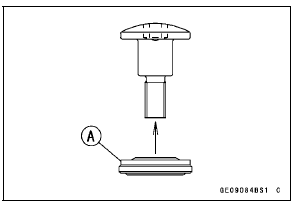
Cover Plug [A] Rubber Cap [B]
Torque - Cylinder Head Cover Plug: 15 N·m (1.5 kgf·m, 11 ft·lb)
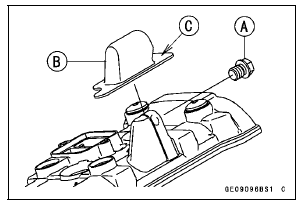
 Cylinder Head Cover Removal
Oil Pressure Measurement
Remove:
Right Lower Fairing (see Lower Fairing Removal in the
Frame chapter)
Oil Passage Plug [A]
Attach the adapter [A] and gauge [B] to the plug hole.
Special Tools - Oil Pressure Gauge, 10 kgf/cm²: 57001-164
Oil Pressure Gauge Adapter, PT3/8: 57001
-1233
...
Rocker Arm Removal
Squeeze the brake lever slowly and hold it with a band.
Remove the front footpeg bracket bolts.
Raise the rear wheel off the ground with the jack (see
Rear Shock Absorber Removal).
Special Tools - Jack: 57001-1238
Jack Attachment: 57001-1608
Remove:
Lower Rear Shock Absorber B ...
Sidestand Switch Operation Inspection
Raise the rear wheel off the ground with the stand (see
Rear Wheel Removal in the Wheels/Tires chapter).
Inspect the sidestand switch [A] operation accordance to
below table.
Sidestand Switch Operation
If the sidestand switch operation does not work, inspect
or replace the foll ...
