
| WARNING Fuel is flammable and explosive under certain conditions and can cause severe burns. Be prepared for fuel spillage; any spilled fuel must be completely wiped up immediately. When the fuel hose is disconnected, fuel spills out from the hose and the pipe. Cover the hose connection with a clean shop towel to prevent fuel spillage. |
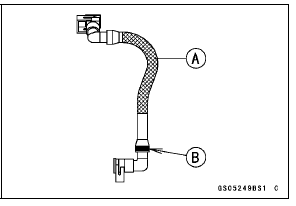
For Primary Fuel Hose (Fuel Tank
 Throttle Body Assy)
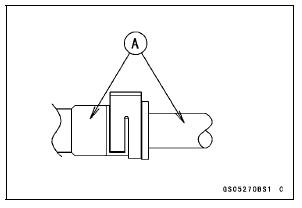
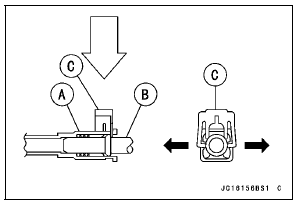
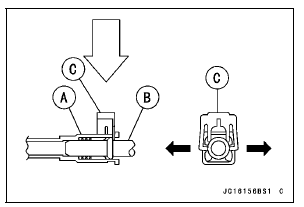
When removing with standard tip screwdriver
When removing with fingers
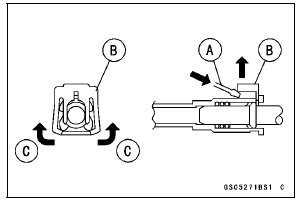
NOTICE
Prying or excessively widening the joint lock ends for fuel hose removal will permanently deform the joint lock, resulting in a loose or incomplete lock that may allow fuel to leak and create the potential for a fire explosion. To prevent fire or explosion from a damaged joint lock, do not pry or excessively widen the joint lock ends when removing the fuel hose. The joint lock has a retaining edge that locks around the housing.
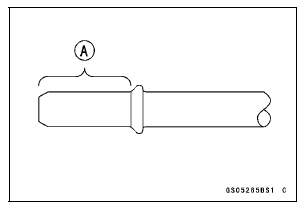
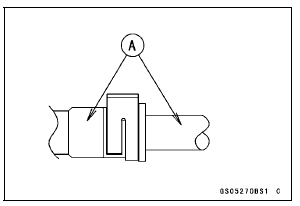
The fuel hose in Brazil model has yellow paint [B].
Check the yellow paint of the fuel hose in the throttle body assy side (Brazil model only).
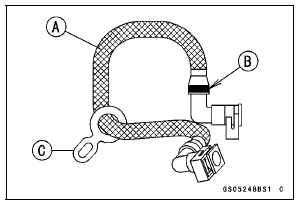
| WARNING Leaking fuel can cause a fire or explosion resulting in severe burns. Make sure the fuel hose joint is installed correctly on the delivery pipe and that it doesn’t leak. |
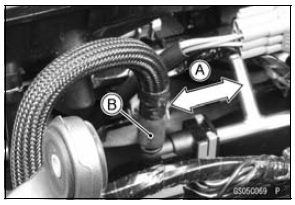
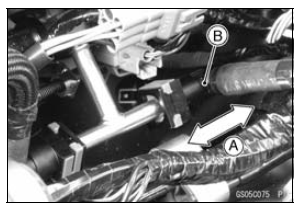
If it comes off, reinstall the hose joint.
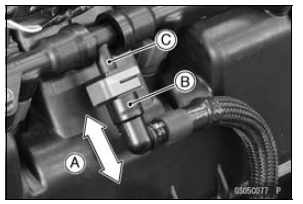
For Secondary Fuel Hose (Throttle Body Assy
 Nozzle Assy)
When removing with standard tip screwdriver
When removing with fingers

NOTICE
Prying or excessively widening the joint lock ends for fuel hose removal will permanently deform the joint lock, resulting in a loose or incomplete lock that may allow fuel to leak and create the potential for a fire explosion. To prevent fire or explosion from a damaged joint lock, do not pry or excessively widen the joint lock ends when removing the fuel hose. The joint lock has a retaining edge that locks around the housing.
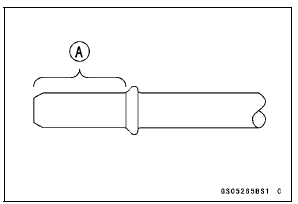
The fuel hose in Brazil model has yellow paint [B].
Check the yellow paint of the fuel hose in the throttle body assy side (Brazil model only).
| WARNING Leaking fuel can cause a fire or explosion resulting in severe burns. Make sure the fuel hose joint is installed correctly on the delivery pipe and that it doesn’t leak. |
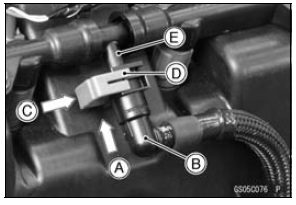
If it comes off, reinstall the hose joint.
NOTICE
When inserting the fuel hose joint, do not apply strong force to the delivery pipe [E] on the nozzle assy. The pipe made from resin could be damaged.
NOTICE
When pushing and pulling the fuel hose joint, do not apply strong force to the delivery pipe [C] on the nozzle assy. The pipe made from resin could be damaged.
| WARNING Leaking fuel can cause a fire or explosion resulting in severe burns. Make sure the fuel hose joint is installed correctly on the delivery pipe and that it doesn’t leak. |
If it comes off, reinstall the hose joint.
 Air Cleaner Element Replacement
 Coolant Change
Parts Location
1. Timing Rotor
2. Crankshaft Sensor
3. Horn
4. Oil Pressure Switch
5. Rear Brake Light Switch
6. Oxygen Sensor (Equipped Models)
7. Alternator
8. Stator Coil
9. Gear Position Switch
10. Sidestand Switch
11. Immobilizer Amplifier (Equipped Models)
12. Radiator Fan Motor
1 ...
Seat Cover Removal
Remove:
Rear Seat (see Rear Seat Removal)
Remove the bolts [A].
Remove the upper seat cover backward [B] to clear the
hook portions.
Remove:
Front Seat (see Front Seat Removal)
Quick Rivets [A]
Bolts [B]
Seat Covers [C]
...
Water Pump Housing Disassembly
NOTICE
Do not damage the hole wall of the water pump
housing.
Insert a bar [A] into the pump housing [B], and hammer
evenly around the circumference of the mechanical seal
bottom [C].
Take the oil seal [A] out of the housing [B] with a hook [C].
...