
| WARNING Coolant can be extremely hot and cause severe burns, is toxic and very slippery. Do not remove the radiator cap or attempt to change the coolant when the engine is hot; allow it cool completely. Immediately wipe any spilled coolant from tires, frame, engine or other painted parts. Do not ingest coolant. |
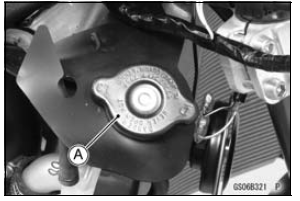
Remove the radiator cap in two steps. First turn the cap counterclockwise to the first stop. Then push and turn it further in the same direction and remove the cap.

Torque - Coolant Drain Bolt (Water Pump): 9.8 N·m (1.0 kgf·m, 87 in·lb)
NOTE
Pour in the coolant slowly so that it can expel the air from the engine and radiator.
NOTICE
Soft or distilled water must be used with the antifreeze (see below for antifreeze) in the cooling system.
If hard water is used in the system, it causes scales accumulation in the water passages, and considerably reduces the efficiency of the cooling system.
Water and Coolant Mixture Ratio (Recommended)
Soft Water: 50%
Coolant: 50%
Freezing Point: –35°C (–31°F)
Total Amount: 2.6 L (2.7 US qt)
NOTE
Choose a suitable mixture ratio by referring to the coolant manufacturer’s directions.
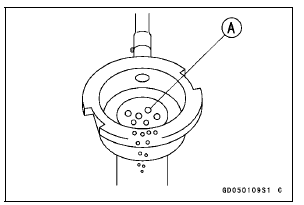
Start the engine with the radiator cap removed and run it until no more air bubbles [A] can be seen in the coolant.
Tap the radiator hoses to force any air bubbles caught inside.
Stop the engine and add coolant up to the radiator filler neck.
If the coolant level is lower than the “L” level line, add coolant to the “F” level line (see Coolant Level Inspection).
NOTICE
Do not add more coolant above the “F” level line.
 Fuel Hose Replacement
 Radiator Hose and O-ring Replacement
ESD (Electronic Steering Damper) ECU Communication Error (Service Code 3C,
ZX1000JD/KD)
ESD ECU Communication Line Inspection
When the data (for status of ESD system) is not sent from
the ESD ECU to the meter unit and ECU, the service code
3C is displayed.
The data is sent through the CAN communication line.
The service code 3C is detected with the meter unit.
The FI symbol does ...
Radiator Fan System
Fan Motor Inspection
Remove the air cleaner housing (see Air Cleaner Housing
Removal in the Fuel System (DFI) chapter).
Disconnect the connector [A].
Using an auxiliary leads, supply battery power to the fan
motor.
If the fan does not rotate, the fan motor is defective and
must be re ...
Throttle Control System
Check the throttle grip play each day
before riding the motorcycle, and carry
out maintenance and adjustments in
accordance with the Periodic Maintenance
Chart. Adjust it if necessary.
Throttle Grip
The throttle grip controls the butterfly
valves in the throttle body. If the throttle
grip ha ...