
Tubeless tires are installed on the wheels of this motorcycle. The indications of “TUBELESS” on the tire side wall and the rim show that the tire and rim are specially designed for tubeless use.
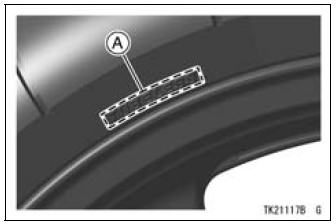
A. “TUBELESS” Mark
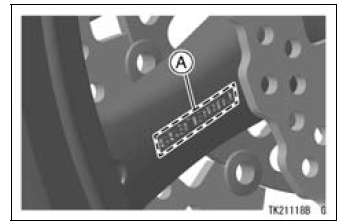
A. “TUBELESS” Mark
The tire and rim form a leakproof unit by making airtight contacts at the tire chamfers and the rim flanges instead of using an inner tube.
| WARNING Installing a tube inside a tubeless- type tire can create excessive heat build up that can damage the tube and cause rapid deflation. The tires, rims, and air valves on this motorcycle are designed only for tubeless type wheels. The recommended standard tires, rims, and air valves must be used for replacement. Do not install tube-type tires on tubeless rims. The beads may not seat properly on the rim causing tire deflation. Do not install a tube inside a tubeless tire. Excessive heat build-up may damage the tube causing tire deflation. |
Tires
 High Speed Compression Damping Adjustment
 Payload and Tire Pressure
Exploded View
HG: Apply high-temperature grease.
HO: Apply heavy oil.
L: Apply a non-permanent locking agent.
MO: Apply molybdenum disulfide oil solution.
(mixture of the engine oil and molybdenum disulfide grease in a weight ratio
10:1)
R: Replacement Parts
Specifications
Special Too ...
Swingarm Bearing Removal
Remove:
Swingarm (see Swingarm Removal)
Collar [A]
Oil Seals [B]
Sleeve [C]
Circlip [D] (Right Side)
Special Tool - Inside Circlip Pliers: 57001-143
Remove the ball bearing and needle bearings.
Special Tool - Oil Seal & Bearing Remover [A]: 57001-1058
...
Bolt and Nut Tightening
In accordance with the Periodic Maintenance Chart, it is very important to
check
the tightness of the bolts and nuts listed here. Also, check to see that each
cotter
pin is in place and in good condition. Please ask your authorized Kawasaki
dealer
for torque values.
1. Clutch Lever Hol ...