
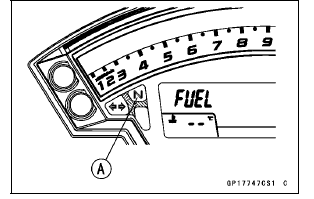
If the indicator light does not go on, replace the meter unit.
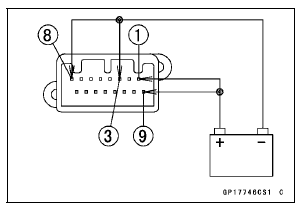
 Check 3-5: Warning Indicator Light (Red LED) (Oil Pressure Warning)
Inspection
Check 3-5: Warning Indicator Light (Red LED) (Oil Pressure Warning)
Inspection Check 3-7 Stop Watch Inspection
Air Intake Duct Removal
Remove:
Upper Fairing Assembly (see Upper Fairing Assembly
Removal in the Frame chapter)
Meter Bracket (see Meter Unit Removal/Installation in
the Electrical System chapter)
Immobilizer Amplifier [A] (Equipped Models) (see Immobilizer
System Parts Replacement in the Electrical System
...
Interlock Operation Inspection
Raise the rear wheel off the ground with the stand [A].
1st Check
Start the engine to the following conditions
Condition:
Transmission Gear → 1st Position
Clutch Lever → Release
Sidestand → Down or Up
Turn the ignition switch to ON and push the starter butto ...
Operating Procedures
Clean the seat area carefully.
Coat the seat with machinist’s dye.
Fit a 45° cutter into the holder and slide it into the valve
guide.
Press down lightly on the handle and turn it right or left.
Grind the seating surface only until it is smooth.
NOTICE
Do not grind the seat too ...